উন্নত একাধিক ট্রেন্ড নিশ্চিতকরণ EMA সরবরাহ এবং চাহিদা অঞ্চল গতিশীল আরবিট্রেজ কৌশল

ওভারভিউ
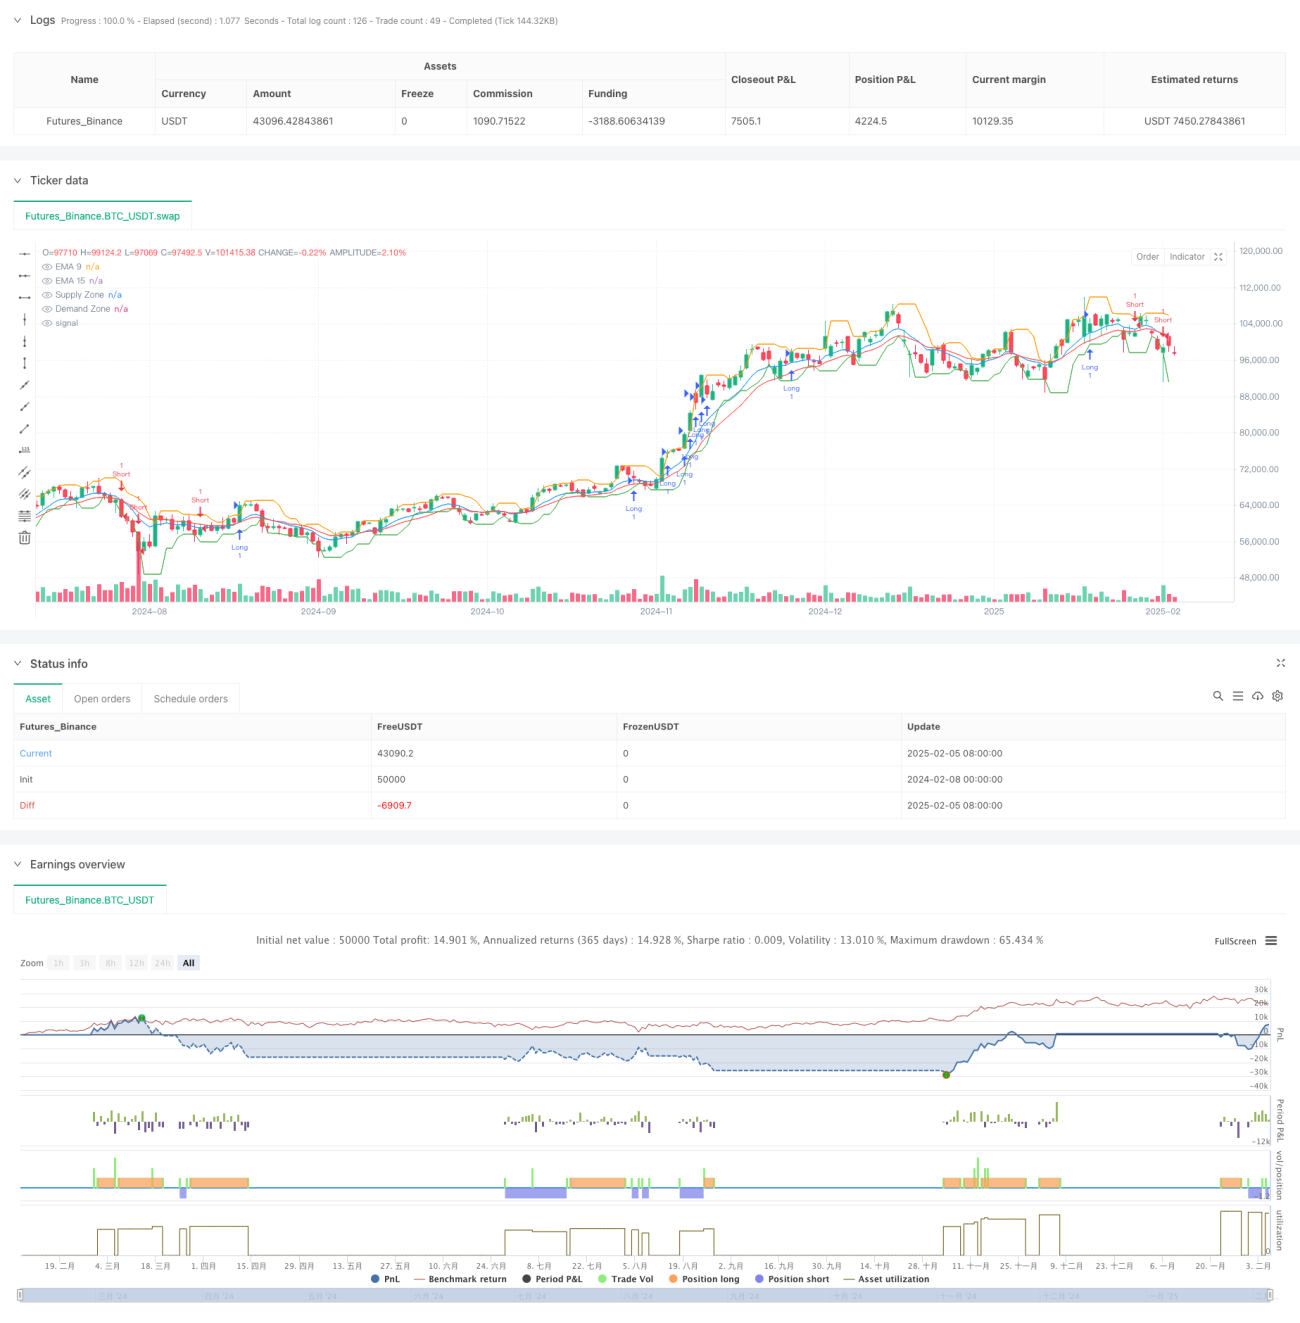
এই কৌশলটি একটি উচ্চ মানের স্বনির্ধারণযোগ্য অ্যারেটিং কৌশল যা গড় লাইন (EMA), সরবরাহ অঞ্চল এবং লেনদেনের পরিমাণকে একত্রিত করে। এটি একাধিক প্রযুক্তিগত সূচকের ক্রস-নিশ্চিতকরণের মাধ্যমে বাজারের প্রবণতা সনাক্ত করে এবং মূল সরবরাহ অঞ্চলের কাছাকাছি লেনদেন করে। এই কৌশলটি গতিশীল স্টপ লস এবং লাভের লক্ষ্য গ্রহণ করে এবং এটিআর সূচকের মাধ্যমে বাজারের অস্থিরতার সাথে খাপ খায়।
কৌশল নীতি
কৌশলটির মূল যুক্তি নিম্নলিখিত মূল উপাদানগুলির উপর ভিত্তি করে:
- ট্রেডিং সিগন্যাল হিসেবে ৯-সাইকেলের এবং ১৫-সাইকেলের EMA-র ট্রেন্ড দিকনির্দেশনা ব্যবহার করে
- উচ্চতর সময় ফ্রেম (১৫ মিনিট) দ্বারা সরবরাহ এবং চাহিদা অঞ্চল দ্বারা গুরুত্বপূর্ণ মূল্য স্তর নির্ধারণ করা
- ট্রেন্ডের কার্যকারিতা যাচাই করার জন্য লেনদেনের ভলিউম ব্যবহার করুন
- ATR-ভিত্তিক ডায়নামিক স্টপ লস এবং রিটার্ন টার্গেট ব্যবহার করে ঝুঁকি পরিচালনা করুন
- একাধিক শর্ত পূরণ হলেই লেনদেন
বিশেষত, যখন 9 চক্রের ইএমএ 3 টি ধারাবাহিক চক্রের জন্য বৃদ্ধি পায়, 15 চক্রের ইএমএও উত্থানের প্রবণতা দেখায় এবং দাম চাহিদা অঞ্চলের উপরে থাকে এবং 20 চক্রের ট্রেডিং ভলিউম গড় 50 চক্রের ট্রেডিং ভলিউম গড়ের চেয়ে বড় হয়, তখন সিস্টেমটি একাধিক সংকেত প্রেরণ করে। খালি সংকেতের যুক্তি বিপরীত।
কৌশলগত সুবিধা
- মাল্টিপল কনফার্মেশন মেকানিজম লেনদেনের নির্ভরযোগ্যতা বৃদ্ধি করেছে
- গতিশীল স্টপ লস এবং লাভের লক্ষ্যগুলি বিভিন্ন বাজারের অবস্থার সাথে খাপ খাইয়ে নিতে পারে
- সরবরাহ ও চাহিদা অঞ্চল ফিল্টারিং দ্বারা অপ্রত্যাশিত মূল্য অঞ্চলে লেনদেন এড়ানো
- ট্রেডিং ভলিউম নিশ্চিতকরণ অতিরিক্ত প্রবণতা যাচাইকরণ প্রদান করে
- বাজার পরিস্থিতির উপর নির্ভর করে ঝুঁকি-লাভের অনুপাতের নমনীয়তা
- বিভিন্ন বাজারের অবস্থার সাথে সামঞ্জস্য রেখে কৌশলগুলি ভালভাবে অভিযোজিত হয়
কৌশলগত ঝুঁকি
- উচ্চ অস্থিরতার বাজারে ভুল সংকেত দেখা দিতে পারে
- মাল্টিপল কনফার্মেশনের ফলে কিছু ব্যবসায়িক সুযোগ মিস হতে পারে
- সরবরাহ ও চাহিদা অঞ্চল চিহ্নিতকরণে বিলম্ব হতে পারে
- ট্রেডিং সিগন্যালের ঘন ঘন উৎপত্তি হতে পারে
ঝুঁকি নিয়ন্ত্রণ ব্যবস্থা:
- বাজারের অস্থিরতার সাথে সামঞ্জস্য রেখে ডায়নামিক এটিআর স্টপ ব্যবহার করুন
- ভুয়া সংকেতগুলিকে ট্রান্সফার ভলিউম দিয়ে ফিল্টার করুন
- কঠোরভাবে ঝুঁকি-লাভের অনুপাত নিয়ন্ত্রণ করা
- মূল মূল্যের এলাকার কাছাকাছি লেনদেন করা
কৌশল অপ্টিমাইজেশনের দিকনির্দেশনা
- স্বয়ংক্রিয় ইএমএ চক্রের প্রবর্তন, যা বাজারের অস্থিরতার সাথে স্বয়ংক্রিয়ভাবে সামঞ্জস্য করতে সক্ষম করে
- মার্কেট স্ট্যাটাস আইডেন্টিফিকেশন মডিউল যোগ করা হয়েছে, যা বিভিন্ন মার্কেট পরিবেশে বিভিন্ন প্যারামিটার ব্যবহার করে
- সরবরাহ এবং চাহিদা অঞ্চলগুলির গণনা পদ্ধতিকে অপ্টিমাইজ করা, সনাক্তকরণের নির্ভুলতা বাড়ানো
- আরও মার্কেট মাইক্রোস্ট্রাকচারাল বিশ্লেষণ যোগ করুন
- ডায়নামিক বিকাশের ঝুঁকি-লাভের তুলনায় সমন্বয় ব্যবস্থা
সারসংক্ষেপ
এটি একটি সম্পূর্ণ ট্রেডিং সিস্টেম যা একাধিক প্রযুক্তিগত বিশ্লেষণ সরঞ্জামকে একত্রিত করে এবং একাধিক নিশ্চিতকরণ প্রক্রিয়া দ্বারা লেনদেনের নির্ভরযোগ্যতা বাড়ায়। কৌশলটির সুবিধা হ'ল এর অভিযোজনযোগ্যতা এবং ঝুঁকি পরিচালনার ক্ষমতা, তবে একই সাথে বিভিন্ন বাজার পরিবেশে পারফরম্যান্সের পার্থক্যগুলিও লক্ষ্য করা দরকার। প্রস্তাবিত অপ্টিমাইজেশনের দিকনির্দেশের মাধ্যমে কৌশলটির আরও উন্নতির জায়গা রয়েছে।
- 1