Advanced Multi-Trend Confirmation EMA Supply-Demand Zone Dynamic Scalping Strategy

Overview
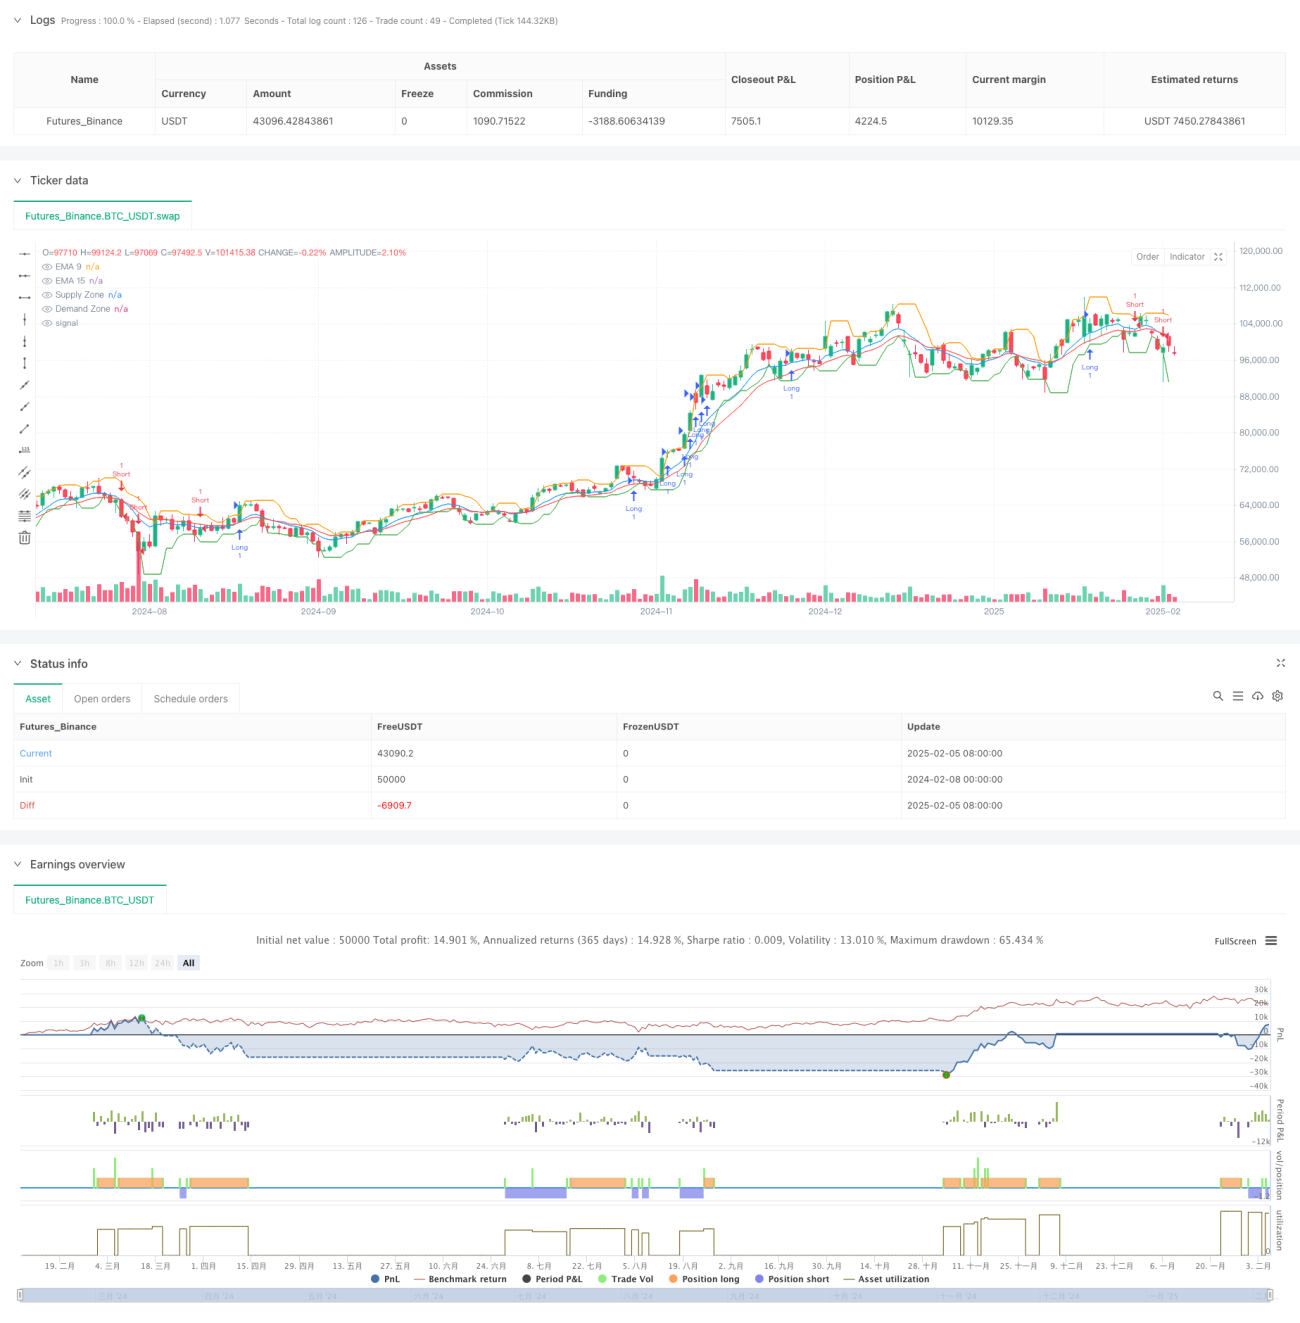
This strategy is an advanced adaptive scalping system that combines Exponential Moving Averages (EMA), supply/demand zones, and volume analysis. It identifies market trends through multiple technical indicator confirmations and executes trades near key supply/demand zones. The strategy employs dynamic stop-loss and take-profit targets using the ATR indicator to adapt to market volatility.
Strategy Principle
The core logic is based on several key elements:
- Using 9-period and 15-period EMA trend directions as primary trading signals
- Identifying important price levels through supply/demand zones from a higher timeframe (15 minutes)
- Utilizing volume confirmation to validate trend strength
- Implementing ATR-based dynamic stop-loss and take-profit targets for risk management
- Executing trades only when multiple conditions are simultaneously met
Specifically, a long signal is generated when the 9-period EMA rises for 3 consecutive periods, the 15-period EMA shows an upward trend, price is above the demand zone, and the 20-period volume SMA is greater than the 50-period volume SMA. Short signals follow the opposite logic.
Strategy Advantages
- Multiple confirmation mechanisms significantly improve trade reliability
- Dynamic stop-loss and take-profit targets adapt to different market conditions
- Supply/demand zone filtering prevents trading in unfavorable price areas
- Volume confirmation provides additional trend validation
- Risk-reward ratio can be flexibly adjusted based on market conditions
- Strategy demonstrates good adaptability to various market conditions
Strategy Risks
- False signals may occur in highly volatile markets
- Multiple confirmation conditions might cause missed trading opportunities
- Supply/demand zone identification may have latency issues
- Frequent trading signals may be generated in ranging markets
Risk control measures:
- Using dynamic ATR stops to adapt to market volatility
- Filtering false signals through volume confirmation
- Implementing strict risk-reward ratio control
- Trading near key price zones
Strategy Optimization Directions
- Introduce adaptive EMA periods that automatically adjust based on market volatility
- Add market state recognition module to use different parameters in different market environments
- Optimize supply/demand zone calculation methods to improve identification accuracy
- Incorporate more market microstructure analysis
- Develop dynamic risk-reward ratio adjustment mechanisms
Summary
This is a comprehensive trading system that integrates multiple technical analysis tools and enhances trade reliability through multiple confirmation mechanisms. The strategy's strengths lie in its adaptability and risk management capabilities, but attention must be paid to performance variations in different market environments. Through the suggested optimization directions, there is room for further improvement of this strategy.
- 1