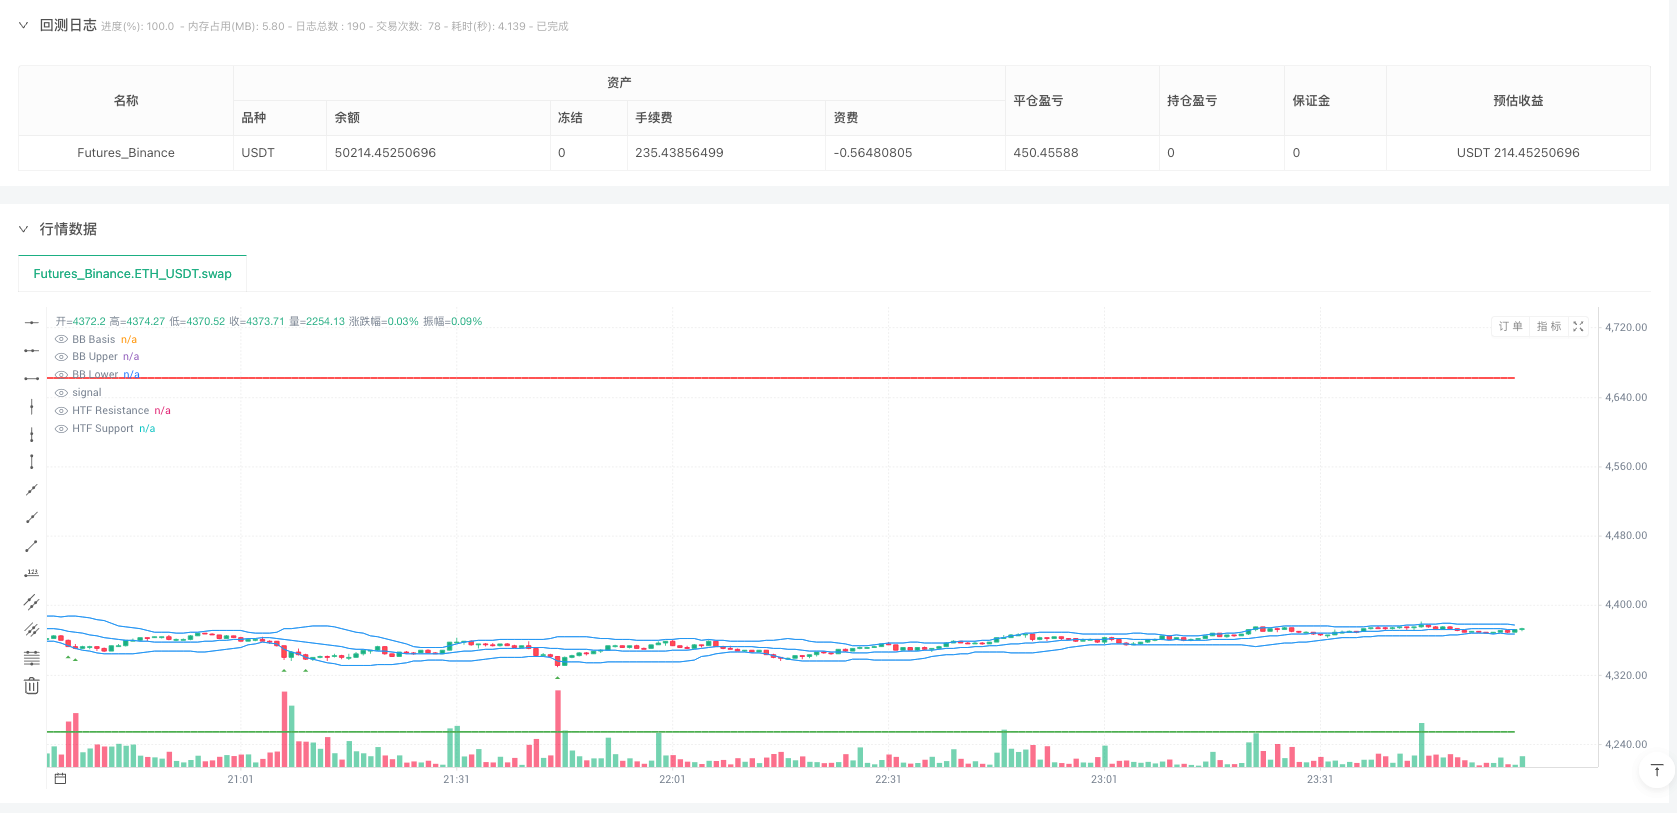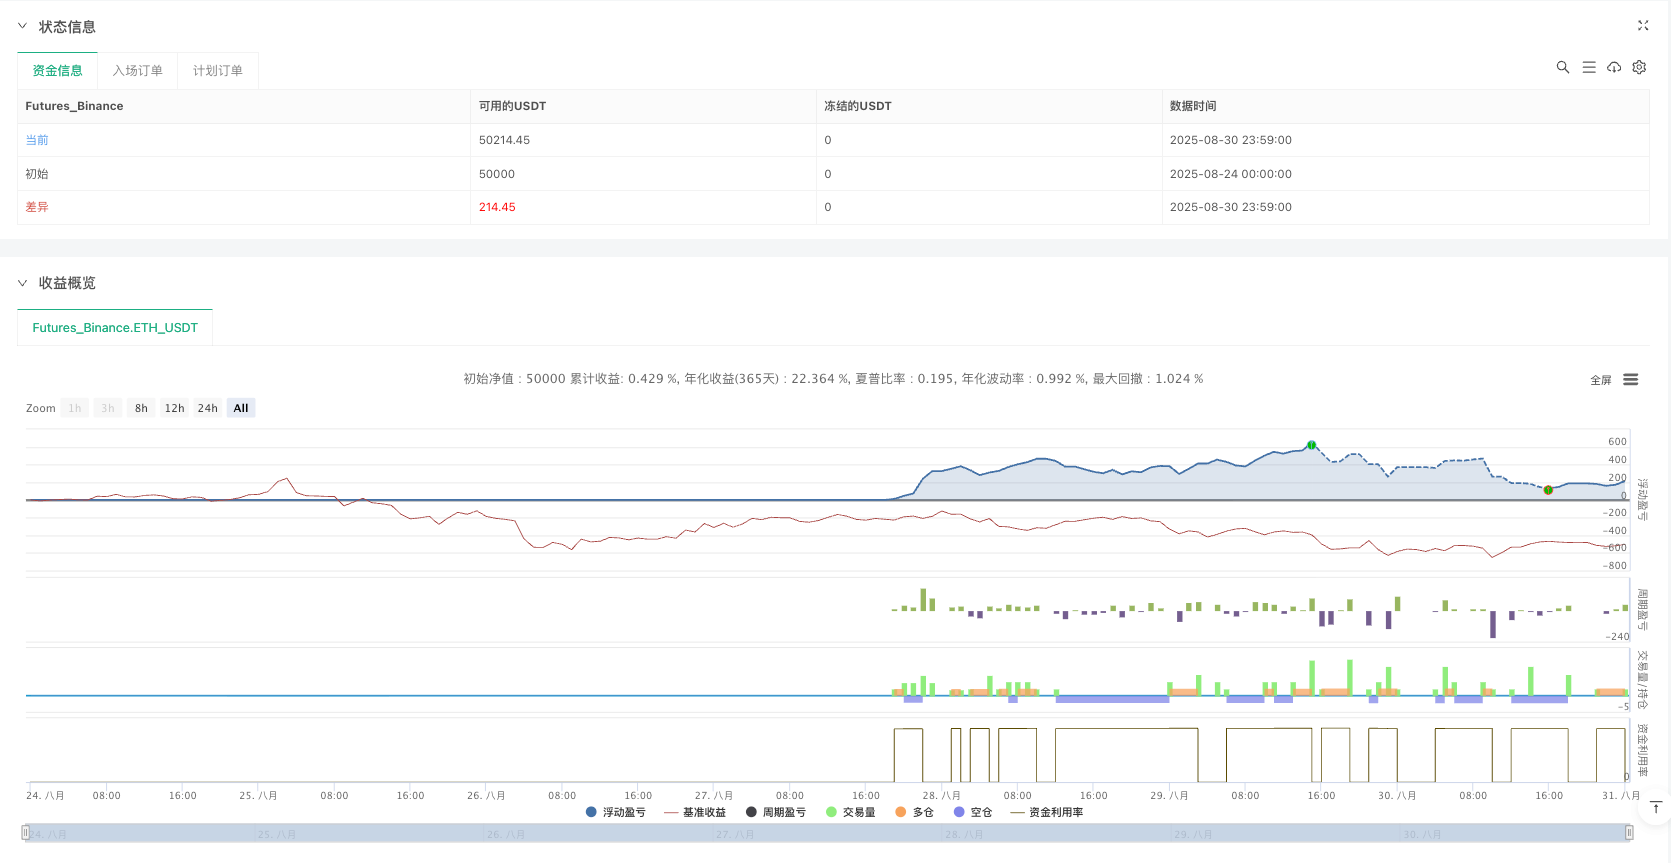

多时间框架区间交易的完美诠释
这不是普通的震荡策略。舞妓区间剥头皮策略通过60分钟高时间框架确定交易区间,在低时间框架寻找布林带+RSI的精确入场点。96周期的区间识别配合20周期布林带,形成了一套完整的区间交易体系。
策略核心逻辑直接明了:价格必须在HTF确定的区间内,触及布林带边界时配合RSI超买超卖信号入场。多头信号要求价格≤布林下轨且RSI≤30,空头信号要求价格≥布林上轨且RSI≥70。这种双重确认机制有效过滤了大量假信号。
2.0倍标准差设置背后的数学逻辑
布林带2.0倍标准差不是随意设置。统计学告诉我们,95%的价格波动会在2倍标准差范围内,这意味着触及边界的概率仅为5%。当价格突破这个概率边界时,回归中轴的可能性显著增加。
20周期的布林带长度在捕捉短期波动和避免过度敏感之间找到平衡点。相比14周期更稳定,比26周期更敏感。配合14周期RSI,形成了经典的动量确认组合。RSI 30/70阈值比传统的20/80更保守,减少了极端市场下的错误信号。
VWAP过滤器:可选但关键的风险控制
0.25%的VWAP容忍度设计精妙。当价格偏离VWAP超过0.25%时,策略暂停交易。这个看似微小的过滤条件,在实际交易中能够避开价格剧烈偏离均值的异常时段。
VWAP代表当日成交量加权平均价格,是机构交易员的重要参考基准。价格在VWAP附近震荡时,市场通常处于相对平衡状态,更适合区间交易策略发挥作用。
止损止盈设计:风险收益比的艺术
策略提供两种止盈模式:中轴止盈和对边止盈。中轴止盈更保守,目标是布林带中线;对边止盈更激进,目标是HTF区间的另一边界。回测数据显示,中轴止盈模式胜率更高但单笔收益较小。
0.15%的止损缓冲设计合理。止损位设在HTF区间边界外0.15%,既给价格留出正常波动空间,又能在真正突破时及时止损。这个缓冲比例经过优化,平衡了止损频率和保护效果。
仓位管理:20%上限的风险控制哲学
最大仓位限制在账户资金的20%,这是激进交易和风险控制的平衡点。相比传统建议的10%更激进,但考虑到策略的高频特性和相对较小的止损幅度,20%的仓位配置是合理的。
动态仓位计算基于实时账户净值,确保每笔交易的风险敞口相对稳定。当账户净值增长时,绝对仓位随之增加;当净值下降时,仓位自动缩减,形成天然的风险调节机制。
适用场景:震荡市的收割机器
策略在横盘震荡市场表现最佳,特别适合波动率适中的品种。强趋势市场下表现不佳,因为价格容易突破HTF区间,触发频繁止损。建议在VIX指数15-25区间内使用,避开极端恐慌或极端贪婪时期。
最佳交易时段是欧美重叠时段(北京时间21:00-24:00),此时流动性充足,价格波动相对规律。亚洲时段由于流动性不足,可能出现价格跳跃,影响策略执行效果。
风险提示:没有完美的交易圣杯
历史回测不代表未来收益,策略存在连续亏损风险。特别是在市场结构发生重大变化时,基于历史数据优化的参数可能失效。建议定期回顾和调整参数设置。
黑天鹅事件下,HTF区间可能瞬间失效,导致止损无法及时执行。建议设置账户级别的最大回撤限制,当日亏损超过账户净值5%时暂停交易。策略不适合重大财经事件前后使用,避开央行决议、非农数据等高影响事件。
||
Multi-Timeframe Range Trading Perfected
This isn’t your average oscillation strategy. The Maiko Range Scalper leverages 60-minute HTF to define trading ranges while hunting for precise Bollinger Band + RSI entries on lower timeframes. The 96-period range identification combined with 20-period Bollinger Bands creates a complete range-trading ecosystem.
Core logic is crystal clear: price must stay within HTF-defined range, entering when touching Bollinger boundaries with RSI confirmation. Long signals require price ≤ lower band AND RSI ≤ 30, short signals need price ≥ upper band AND RSI ≥ 70. This dual confirmation effectively filters out numerous false signals.
Mathematical Logic Behind 2.0 Standard Deviation Setting
The 2.0x Bollinger multiplier isn’t arbitrary. Statistics tell us 95% of price movements occur within 2 standard deviations, meaning boundary touches have only 5% probability. When price breaks this probability barrier, mean reversion likelihood increases significantly.
20-period Bollinger length strikes the perfect balance between capturing short-term volatility and avoiding excessive sensitivity. More stable than 14-period, more responsive than 26-period. Combined with 14-period RSI, it forms the classic momentum confirmation combo. RSI 30⁄70 thresholds are more conservative than traditional 20⁄80, reducing false signals in extreme markets.
VWAP Filter: Optional But Critical Risk Control
The 0.25% VWAP tolerance is brilliantly designed. When price deviates beyond 0.25% from VWAP, strategy pauses trading. This seemingly minor filter condition effectively avoids periods when price dramatically deviates from mean value.
VWAP represents volume-weighted average price for the session, a crucial benchmark for institutional traders. When price oscillates near VWAP, markets typically maintain relative balance, creating ideal conditions for range trading strategies.
Stop-Loss & Take-Profit Design: Risk-Reward Artistry
Strategy offers two profit-taking modes: mid-band exit and opposite-band exit. Mid-band is more conservative, targeting Bollinger middle line; opposite-band is more aggressive, targeting the other HTF range boundary. Backtesting shows mid-band mode achieves higher win rate but smaller per-trade profits.
0.15% stop-loss buffer design is well-calibrated. Stop-loss sits 0.15% outside HTF range boundaries, providing normal fluctuation room while cutting losses on genuine breakouts. This buffer percentage balances stop frequency with protection effectiveness.
Position Management: 20% Cap Risk Control Philosophy
Maximum position limited to 20% of account equity balances aggressive trading with risk control. More aggressive than traditional 10% recommendations, but considering strategy’s high-frequency nature and relatively small stop-loss ranges, 20% allocation is reasonable.
Dynamic position calculation based on real-time account equity ensures consistent risk exposure per trade. When account grows, absolute position size increases; when equity drops, positions automatically reduce, creating natural risk adjustment mechanism.
Optimal Scenarios: Sideways Market Harvester
Strategy performs best in sideways choppy markets, particularly suitable for moderate volatility instruments. Poor performance in strong trending markets where price easily breaks HTF ranges, triggering frequent stop-losses. Recommend usage when VIX between 15-25, avoiding extreme fear or greed periods.
Optimal trading hours are European-American overlap (9:00 PM - 12:00 AM Beijing time) when liquidity is abundant and price movements relatively regular. Asian sessions may produce price gaps due to insufficient liquidity, affecting strategy execution.
Risk Warning: No Perfect Trading Holy Grail
Historical backtesting doesn’t guarantee future returns; strategy carries consecutive loss risks. Especially when market structure undergoes major changes, parameters optimized on historical data may become ineffective. Regular parameter review and adjustment recommended.
During black swan events, HTF ranges may instantly fail, preventing timely stop-loss execution. Suggest implementing account-level maximum drawdown limits, suspending trading when daily losses exceed 5% of account equity. Strategy unsuitable around major economic events; avoid central bank decisions, NFP releases, and other high-impact announcements.
[/trans]
/*backtest
start: 2025-08-24 00:00:00
end: 2025-08-31 00:00:00
period: 1m
basePeriod: 1m
exchanges: [{"eid":"Futures_Binance","currency":"ETH_USDT"}]
*/

//@version=5
strategy("Maiko Range Scalper (Sideways BB + RSI) – v4 clean",
     overlay=true,
     initial_capital=5000,
     commission_type=strategy.commission.percent, commission_value=0.06)

// ===== Inputs =====
tfHTF     = input.timeframe("60", "HTF voor range (15 of 60)")
lenRange  = input.int(96, "HTF lookback voor range (bars)", minval=10)
bbLen     = input.int(20, "Bollinger lengte", minval=5)
bbMult    = input.float(2.0, "Bollinger std dev", step=0.1)
rsiLen    = input.int(14, "RSI lengte", minval=5)
rsiLong   = input.int(30, "RSI drempel Long ≤", minval=5, maxval=50)
rsiShort  = input.int(70, "RSI drempel Short ≥", minval=50, maxval=95)
useVWAP   = input.bool(false, "Extra filter: prijs nabij VWAP (±X%)")
vwapBand  = input.float(0.25, "VWAP tolerantie %", step=0.05)
tpMode    = input.string("Mid band", "Take-Profit doel", options=["Mid band","Tegenoverliggende band/Range"])
slBufferP = input.float(0.15, "SL buffer buiten range (%)", step=0.05, minval=0.05)
maxPosPct = input.float(20, "Max positie t.o.v. account (%)", step=1)

// ===== HTF Range (MTF) =====
htfHigh = request.security(syminfo.tickerid, tfHTF, ta.highest(high, lenRange))
htfLow  = request.security(syminfo.tickerid, tfHTF, ta.lowest(low,  lenRange))
rangeMid = (htfHigh + htfLow) / 2.0

// ===== LTF Indicatoren =====
basis  = ta.sma(close, bbLen)
dev    = ta.stdev(close, bbLen) * bbMult
bbU    = basis + dev
bbL    = basis - dev
rsi    = ta.rsi(close, rsiLen)
vwapV  = ta.vwap

// ===== Filters =====
inRange = (close <= htfHigh) and (close >= htfLow)
vwapOK  = not useVWAP or (math.abs(close - vwapV) / vwapV * 100 <= vwapBand)

// ===== Signalen =====
longCond  = inRange and vwapOK and (close <= bbL) and (rsi <= rsiLong)
shortCond = inRange and vwapOK and (close >= bbU) and (rsi >= rsiShort)

// ===== Position sizing =====
equity      = strategy.equity
maxQtyValue = equity * (maxPosPct / 100.0)
qty         = maxQtyValue / close

// ===== Stops & Targets =====
longSL  = htfLow  * (1.0 - slBufferP / 100.0)
shortSL = htfHigh * (1.0 + slBufferP / 100.0)

longTP  = tpMode == "Mid band" ? basis : math.max(basis, htfHigh)
shortTP = tpMode == "Mid band" ? basis : math.min(basis, htfLow)

// ===== Huidige positie =====
isFlat  = strategy.position_size == 0
isLong  = strategy.position_size > 0
isShort = strategy.position_size < 0

// ===== Orders =====
if (longCond and (isFlat or isShort))
    strategy.entry("Long", strategy.long, qty=qty)
    strategy.exit("L-Exit", from_entry="Long", stop=longSL, limit=longTP)

if (shortCond and (isFlat or isLong))
    strategy.entry("Short", strategy.short, qty=qty)
    strategy.exit("S-Exit", from_entry="Short", stop=shortSL, limit=shortTP)

// ===== Plots =====
plot(htfHigh, "HTF Resistance", color=color.new(color.red, 0),   linewidth=2)
plot(htfLow,  "HTF Support",    color=color.new(color.green, 0), linewidth=2)
plot(basis, "BB Basis", color=color.new(color.blue, 0))
plot(bbU,   "BB Upper", color=color.new(color.blue, 0))
plot(bbL,   "BB Lower", color=color.new(color.blue, 0))
plot(vwapV, title="VWAP", color=color.new(color.purple, 0), display=useVWAP ? display.all : display.none)

// ===== Signal markeringen =====
plotshape(longCond,  title="Long signal",  style=shape.triangleup,   location=location.belowbar, size=size.tiny, color=color.new(color.green, 0))
plotshape(shortCond, title="Short signal", style=shape.triangledown, location=location.abovebar, size=size.tiny, color=color.new(color.red,   0))

// ===== Alerts =====
alertcondition(longCond,  title="Long Setup",  message="Long setup: BB bounce + RSI in HTF-range")
alertcondition(shortCond, title="Short Setup", message="Short setup: BB bounce + RSI in HTF-range")