EMA bands + Leledc + Bollinger bands trend following strategy

Overview
This is a positional trend following strategy that utilizes a combination of EMA bands, Leledc exhaustion lines and Bollinger bands to identify trends and establish long or short positions when trend signals appear.
Strategy Logic
Open Conditions
-
Go long when price breaks out above the middle EMA bands (midpoint of high EMA and low EMA); go short when price breaks down below the middle EMA bands.
-
A slow EMA filter can be enabled, so that positions are opened only if close breaks the middle bands and slow EMA agrees.
-
Middle band bounce re-entry can be enabled, so that positions are reopened only if price touches the middle band again after initial middle band breakout.
Close Conditions
-
Select nearest band to close positions when price hits the opposite side of middle EMA bands.
-
Select opposite band to close positions when price completely breaks out the opposite side of middle EMA bands.
-
Delayed close inside bands can be selected to close positions if price trades inside middle bands for a number of periods.
-
Select close on Leledc bars to close positions when consecutive candles close strongly in one direction and reach recent high/low.
-
Select close on BB exhaustion bars to close positions when price reverts inside BB bands from overbought/oversold areas.
-
Select close on loss of Buy/Sell zones when price breaks significant long term support/resistance levels.
Counter Trend Entry Conditions
-
Counter trend positions can be enabled on appearance of Leledc or BB exhaustion bars, with added filter that extreme price must break inner or outer Buy/Sell zones.
-
Independent stop loss conditions can be configured for counter trend trades.
Advantages
-
EMA bands help clearly identify trend direction, avoiding choppy whipsaws.
-
Leledc exhaustion and BB reversioncombinely signal good times to take profit as trend finishes.
-
Counter trend trades allow range trading during consolidation while trend trading in persistent trends.
-
Visual plot of bands intuitively displays current trend strength.
Risks
-
EMA indicators are sensitive to parameter tuning, inappropriate EMA length can cause unprofitable whipsaw trades.
-
Leledc and BB bars as exhaustion signals may fail, thus missing chance to exit leading to large losses.
-
Counter trend trades significantly increase strategy risk, must be used with stop loss.
Enhancement Areas
-
Test different EMA lengths to find optimal values for different products and timeframes.
-
Fine tune Leledc and BB parameters to better identify trend exhaustion points.
-
Further optimize counter trend stop loss levels to balance risk reward.
-
Experiment with simple moving averages or other indicators to plot more stable middle bands.
Summary
This strategy consolidates various techniques of trend identification, exhaustion confirmation and counter trend scalping, offering rich functionality. With prudent parameter tuning and risk control, it can achieve solid risk adjusted returns and is worthy of further research and optimization.
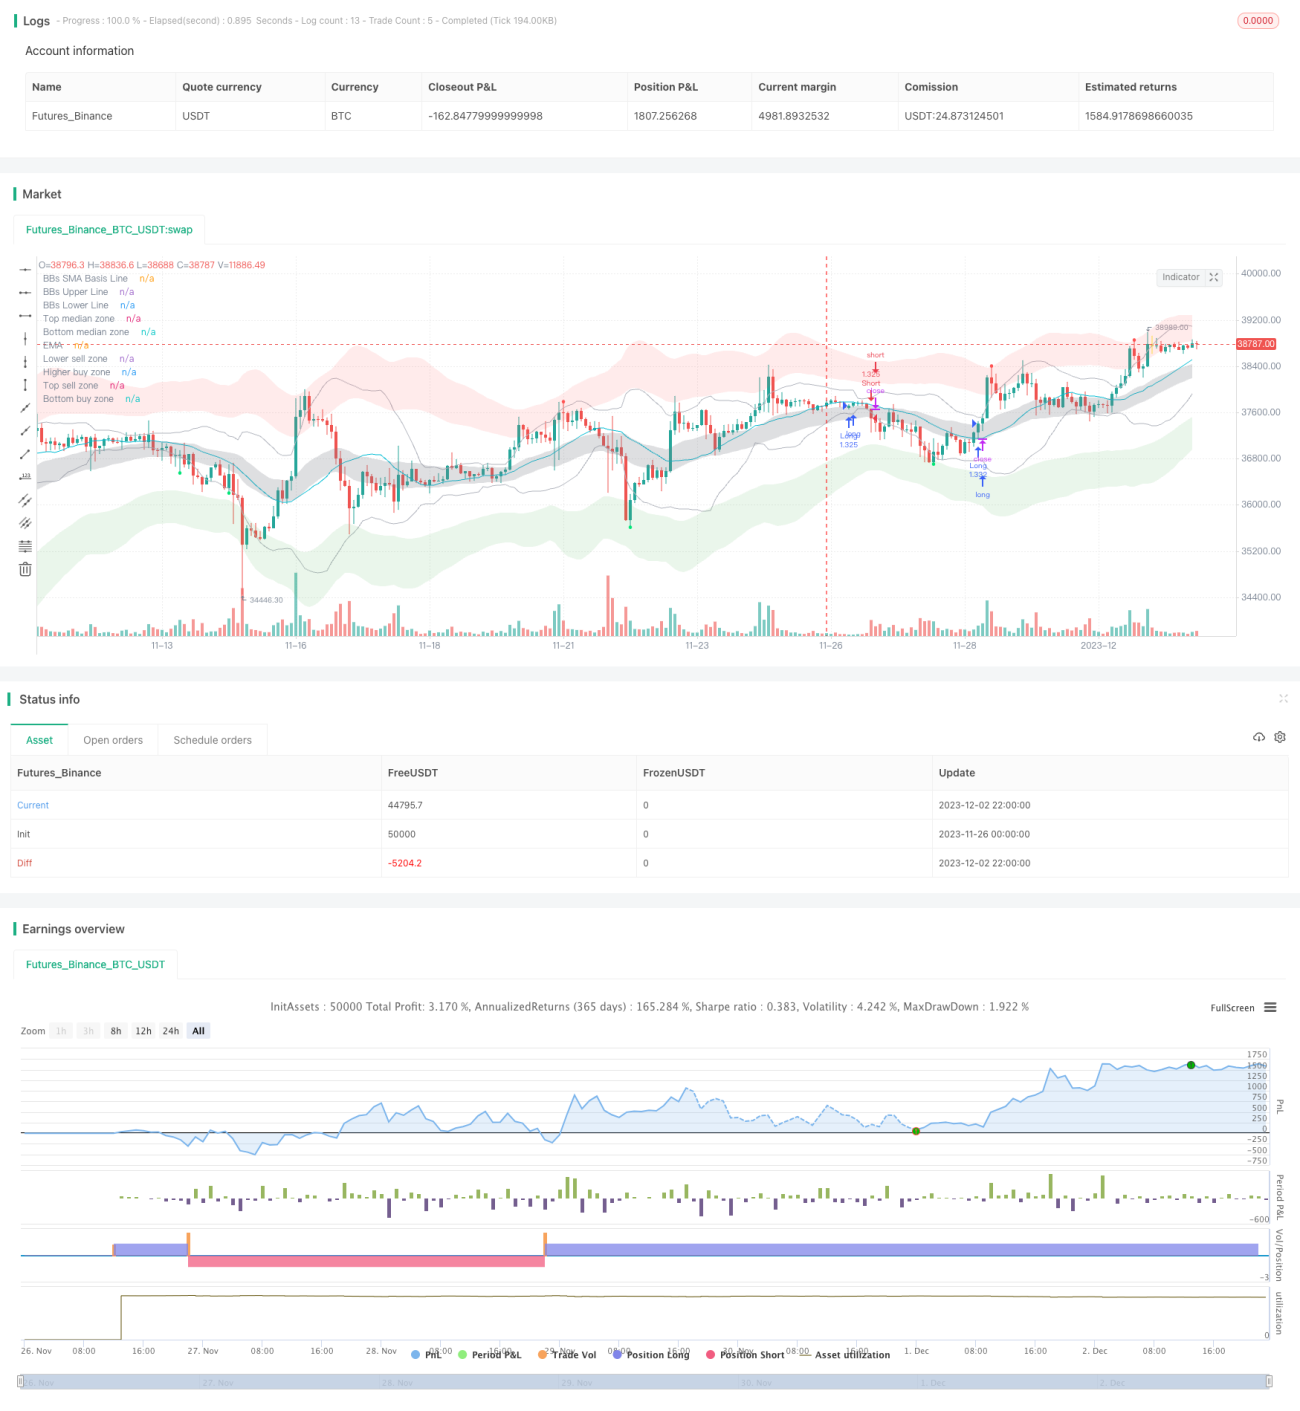
/*backtest
start: 2023-11-26 00:00:00
end: 2023-12-03 00:00:00
period: 2h
basePeriod: 15m
exchanges: [{"eid":"Futures_Binance","currency":"BTC_USDT"}]
*/

// This source code is subject to the terms of the Mozilla Public License 2.0 at https://mozilla.org/MPL/2.0/
// © danielx888
// Credits to Joy_Bangla for the Leledc exhaustion bar code
// Credits to VishvaP for the 34 EMA bands code- 1