Construcción de funciones de botón interactivo en la barra de estado de la estrategia
El autor:- ¿ Por qué?, Creado: 2023-07-13 14:14:38, Actualizado: 2024-01-02 21:29:26
Construcción de funciones de botón interactivo en la barra de estado de la estrategia
Descripción en la documentación de la API
// You can also construct a button in the form, and use GetCommand to receive the contents of the cmd attribute.
var table = {
    type: 'table',
    title: 'position operation',
    cols: ['Column1', 'Column2', 'Action'],
    rows: [
        ['abc', 'def', {'type':'button', 'cmd': 'coverAll', 'name': 'close position'}],
    ]
};
LogStatus('`' + JSON.stringify(table) + '`')
// Or construct a separate button
LogStatus('`' + JSON.stringify({'type':'button', 'cmd': 'coverAll', 'name': 'close position'}) + '`')
// Button styles can be customized (bootstrap's button attributes)
LogStatus('`' + JSON.stringify({'type':'button', 'class': 'btn btn-xs btn-danger', 'cmd': 'coverAll', 'name': 'close position'}) + '`')
La documentación de la API muestra que la visualización de tablas, cadenas, imágenes, gráficos, etc. en la barra de estado de la estrategia se logra llamando a la función API:
LogStatus¿ Qué pasa? También podemos configurar un botón interactivo construyendo un dato JSON.
Código de origen de la demostración:
function test1(p) {
Log("Calls a custom function with parameters:", p);
return p;
}
function main() {
while (true) {
var table = {
type: 'table',
title: 'position operation',
cols: ['Column1', 'Column2', 'Action'],
rows: [
['a', '1', {
'type': 'button', // To display a button, you must set the type to button.
'cmd': "CoverAll", // String, sent data, accepted by the GetCommand() function.
'name': 'close position' // The name displayed on the button.
}],
['b', '1', {
'type': 'button',
'cmd': 10, // numerical value
'name': 'Send value'
}],
['c', '1', {
'type': 'button',
'cmd': _D(), // The function is called for the duration of the strategy run
'name': 'call the function'
}],
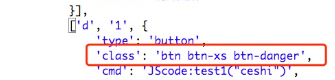
['d', '1', {
'type': 'button',
'cmd': 'JScode:test1("ceshi")', // String, the JS code to execute.
'name': 'Send JS Code'
}]
]
};
LogStatus('`' + JSON.stringify(table) + '`')
var str_cmd = GetCommand();
if (str_cmd) {
Log("Received Interaction Data str_cmd:", "type:", typeof(str_cmd), "value:", str_cmd);
}
if (str_cmd && str_cmd.split(':', 2)[0] == "JScode") { // Determine if there is a message
var js = str_cmd.split(':', 2)[1]; // Split the returned message string, limit it to two, and assign the element with index 1 to a variable named js.
Log("Execute debugging code:", js); // Output executed code
try { // Abnormal detection
eval(js); // Executes the eval function, which executes the parameters (code) passed in.
} catch (e) { // throw an exception
Log("Exception", e); // Output error messages
}
}
Sleep(500);
}
}
La estrategia es la siguiente:
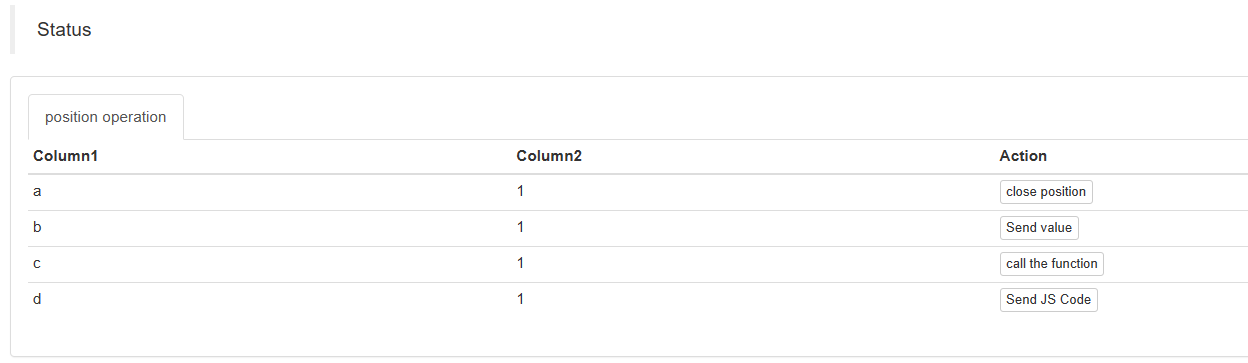
Podemos activar la interacción haciendo clic en los botones de la tabla en la barra de estado.
Cuando hacemos clic en el botón

> But it doesn't work when you click on "Send value" because[ ```'cmd': 10, // value``` ]Here is 10. Numeric types cannot be sent.
https://www.fmz.com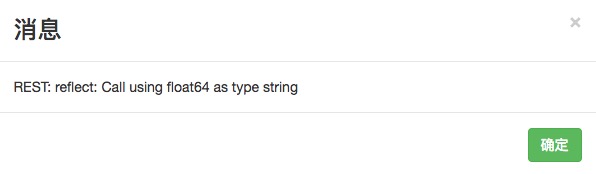
# It has been optimized to be compatible with numeric values, and returns a string of values.
A continuación, hacemos clic en el botón
Los datos recibidos se imprimen en el registro:

Finalmente, vamos a hacer clic en el botón
function test1(p) {
    Log("Calls a custom function with parameters:", p);
    return p;
}
Haga clic en el botón:

Puede ver que se ejecutó la declaración Log (("Llamando función personalizada con parámetros: ", p); en función test1.
Insertando
¡Comienza y practica ahora mismo!
- FMZ Uniswap V3 Cuantificación de la movilidad de las piscinas de intercambio (I)
- Configuración de parámetros de la interfaz de estrategia
- FMZ Plataforma cuantitativa de criptomonedas Guía de uso de WebSocket (explicación detallada de la función de marcado mejorada)
- Curso de Python en X minutos
- Curso rápido en JavaScript en X minutos
- Con respecto a cómo colocar órdenes de límite de BitMEX y órdenes por lotes utilizando IO (un ejemplo)
- Biblioteca de código abierto FMZ Quant TA, aprender a usar (con versiones Javascript / Python / C ++)
- Plataforma de negociación de FMZ Quant Protocolo personalizado Acceso a intercambios personalizados
- FMZ ha lanzado el motor local de pruebas de Python
- Tutoriales avanzados para escribir estrategias de la plataforma FMZ Quant
- Aplicación de la función "__Thread" en el diseño de estrategias JavaScript