전략 상태 표시줄에서 인터랙티브 버튼 함수를 구성합니다
저자:리디아, 창작: 2023-07-13 14:14:38, 업데이트: 2024-01-02 21:29:26
전략 상태 표시줄에서 인터랙티브 버튼 함수를 구성합니다
API 문서에 설명
// You can also construct a button in the form, and use GetCommand to receive the contents of the cmd attribute.
var table = {
    type: 'table',
    title: 'position operation',
    cols: ['Column1', 'Column2', 'Action'],
    rows: [
        ['abc', 'def', {'type':'button', 'cmd': 'coverAll', 'name': 'close position'}],
    ]
};
LogStatus('`' + JSON.stringify(table) + '`')
// Or construct a separate button
LogStatus('`' + JSON.stringify({'type':'button', 'cmd': 'coverAll', 'name': 'close position'}) + '`')
// Button styles can be customized (bootstrap's button attributes)
LogStatus('`' + JSON.stringify({'type':'button', 'class': 'btn btn-xs btn-danger', 'cmd': 'coverAll', 'name': 'close position'}) + '`')
API 문서는 전략 상태 표시줄에 테이블, 문자열, 이미지, 차트 등을 표시하는 것은 API 함수를 호출하여 수행된다는 것을 보여줍니다.
LogStatus- 그래요 우리는 JSON 데이터를 구성하여 대화형 버튼을 설정할 수도 있습니다.
DEMO 소스 코드:
function test1(p) {
    Log("Calls a custom function with parameters:", p);
    return p;
}
function main() {
    while (true) {
        var table = {
            type: 'table',
            title: 'position operation',
            cols: ['Column1', 'Column2', 'Action'],
            rows: [
                ['a', '1', {
                    'type': 'button',                       // To display a button, you must set the type to button.
                    'cmd': "CoverAll",                      // String, sent data, accepted by the GetCommand() function.
                    'name': 'close position'                           // The name displayed on the button.
                }],
                ['b', '1', {
                    'type': 'button',
                    'cmd': 10,                              // numerical value
                    'name': 'Send value'
                }],
                ['c', '1', {
                    'type': 'button',
                    'cmd': _D(),                            // The function is called for the duration of the strategy run
                    'name': 'call the function'
                }],
                ['d', '1', {
                    'type': 'button',
                    'cmd': 'JScode:test1("ceshi")',       // String, the JS code to execute.
                    'name': 'Send JS Code'
                }]
            ]
        };
        LogStatus('`' + JSON.stringify(table) + '`')

        var str_cmd = GetCommand();
        if (str_cmd) {
            Log("Received Interaction Data str_cmd:", "type:", typeof(str_cmd), "value:", str_cmd);
        }

        if (str_cmd && str_cmd.split(':', 2)[0] == "JScode") {          // Determine if there is a message
            var js = str_cmd.split(':', 2)[1];                          // Split the returned message string, limit it to two, and assign the element with index 1 to a variable named js.
            Log("Execute debugging code:", js);                                     // Output executed code
            try {                                                       // Abnormal detection
                eval(js);                                               // Executes the eval function, which executes the parameters (code) passed in.
            } catch (e) {                                               // throw an exception
                Log("Exception", e);                                    // Output error messages
            }
        }

        Sleep(500);
    }
}
실행해보죠. 전략은 아래와 같습니다.
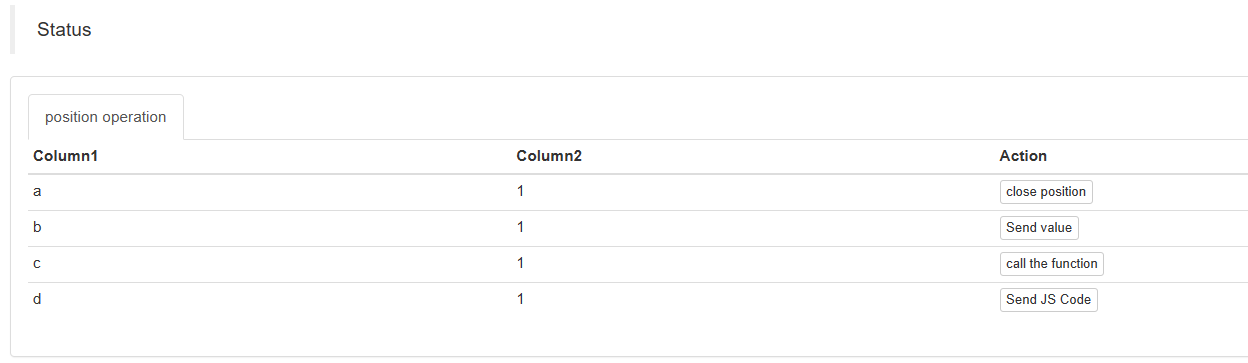
우리는 상태 표시줄에 있는 테이블의 버튼을 클릭하여 상호 작용을 유발할 수 있습니다. 우리는

> But it doesn't work when you click on "Send value" because[ ```'cmd': 10, // value``` ]Here is 10. Numeric types cannot be sent.
https://www.fmz.com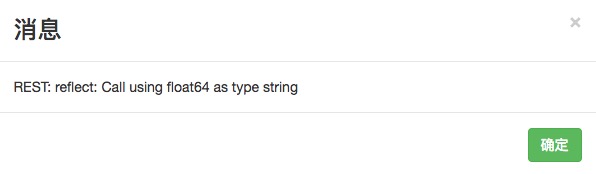
# It has been optimized to be compatible with numeric values, and returns a string of values.
다음으로
수신된 데이터는 로그에 인쇄됩니다.

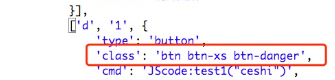
마지막으로, JS 코드를 보내기 버튼을 클릭하면 코드를 테스트하는 사용자 정의 함수를 실행할 수 있습니다.
function test1(p) {
    Log("Calls a custom function with parameters:", p);
    return p;
}
버튼을 클릭하세요:

당신은 로그 (Log) 를 볼 수 있습니다. "파라미터와 사용자 정의 함수를 호출: ", p); 함수 테스트1에서 문구가 실행되었습니다.
당장 연습을 시작해!
더 많은
- FMZ 양적Uniswap V3 교환 풀 유동성 관련 운영 지침서 (1)
- 전략 인터페이스 매개 변수 설정
- FMZ 암호화폐 양적 플랫폼 웹소켓 사용 안내 ( 업그레이드 된 다이얼 기능의 자세한 설명)
- 파이썬 크래시 코스 X분 안에
- X분 안에 자바스크립트 크래시 코스
- BitMEX 포스트-온리 리미트 오더와 래치 오더를 IO를 사용하여 배치하는 방법 (예제)
- 오픈 소스 FMZ 퀀트 TA 라이브러리, 사용법을 배우십시오 (Javascript/Python/C++ 버전)
- FMZ 양자 거래 플랫폼 사용자 지정 프로토콜 사용자 지정 거래소 접근
- FMZ는 파이썬 로컬 백테스트 엔진을 출시했습니다.
- FMZ Quant 플랫폼 전략 작성에 대한 고급 튜토리얼
- 자바스크립트 전략 설계에서 "__ 스레드" 함수의 응용