암호화폐 스팟 헤지 전략 설계 (2)
저자:리디아, 창작: 2022-07-19 15:19:52, 업데이트: 2023-09-24 19:34:38
암호화폐 현금 헤지 전략 설계 (2)
이전 기사에서 우리는 간단한 헤지 전략을 함께 실행했고, 그 다음에는 이 전략을 업그레이드하는 방법을 배우게 될 것입니다. 전략의 변화는 크지 않지만 변경 사항에 대한 세부 사항은 주의가 필요합니다. 코드 내의 일부 장소의 정의는 이전 것과 달라졌습니다. 이해해야합니다.
이 전략을 업그레이드 할 필요성
- 스팟 거래 대상 레버리지 모드를 전환 이 변경은 실제 봇과만 관련이 있습니다. 일부 스팟 거래소는 스팟 레버리지 인터페이스를 가지고 있으며 FMZ에 캡슐화되어 있습니다. FMZ에 직접 패키지되어 스팟 레버리지를 지원하는 거래소 객체에서는 모드를 직접 전환할 수 있습니다.
- 스프레드 차트 표시를 추가합니다
스프레드 차트 디스플레이를 추가합니다.
A exchange -> B exchange,B exchange -> A exchange, 그리고 퍼진을 유발하는 수평선을 그립니다.line drawing class library직접적으로 처리 할 수 있습니다. 이 장점은 사용하기 쉽다는 것입니다.template class libraryFMZ의 기능 - 일방적인 헤지 기능 이 변화는 두 거래소 사이의 가격 차이를 특정 헤지 트랜잭션에서 완전히 역전시키는 것이 어렵기 때문에 상당히 의미있을 수 있습니다. 대부분의 경우 한 거래소의 가격은 다른 거래소의 가격보다 지속적으로 높습니다. 이 시점에서, 우리의 자산이 완전히 헤지 된 경우 (즉, 동전이 모두 낮은 가격으로 거래소에 있으며 돈이 높은 가격으로 거래소에 있습니다). 헤지는 정체되어 있으며 더 이상 이익을 얻기 위해 스프레드의 변동에 의존 할 수 없습니다. 이 시점에서 우리는 동전을 다시 헤지하기 위해 약간의 돈을 잃을 수 있도록 전략을 만들어야합니다 (고가의 동전이 다시 거래소에 존재하도록하십시오), 가격 차이가 다시 커지면 헤지하고 이익을 얻을 수 있습니다.
- 헤지 스프레드 라인 같은 매개 변수를 상호적으로 수정합니다. 전략에 인터랙티브 기능을 추가하여 실시간으로 스프레드 트리거 라인을 수정합니다.
- 상태 표시줄 정보를 정리하고 테이블 형식으로 표시 쉽게 볼 수 있도록 표시해야 하는 데이터를 정리합니다.
다음으로, 이 디자인을 하나씩 구현해 보겠습니다.
스팟 교환 객체 레버리지 모드를 변경
예를 들어 Binance 스팟 실제 봇을 가져, 스팟 레버레이드 모드로 전환, 코드를 사용exchanges[i].IO, 매개 변수를 입력trade_normal지점별로 레버리지로 전환하고 입력trade_super_margin레버리지 풀 포지션으로 전환하려면 백테스팅이 지원되지 않습니다. 이것은 실제 봇에서만 사용됩니다.
준비 단계의 시작에 추가main기능:
    // Switch leverage mode
    for (var i = 0 ; i < exchanges.length ; i++) {   // Traverse and detect all added exchange objects
        if (exchanges[i].GetName() == "Binance" && marginType != 0) {   //If the exchange object represented by the current i-index is Binance spot, and the parameter marginType of the strategy interface is not the option of "common currency", execute the switch operation
            if (marginType == 1) {
                Log(exchanges[i].GetName(), "Set to leveraged position-by-position")
                exchanges[i].IO("trade_normal")
            } else if (marginType == 2) {
                Log(exchanges[i].GetName(), "Set to leveraged full position")
                exchanges[i].IO("trade_super_margin")
            }
        }
    }
이 전략은 바이낸스 스팟의 코인-투-코인 레버리지 모드를 전환하는 코드를 추가합니다. 따라서 전략 매개 변수에 대한 스위치 설정은 바이낸스 스팟에서만 유효합니다.
스프레드 차트 표시가 추가되었습니다
이미 포장 된 그림 템플릿을 사용하는 것이 매우 쉽습니다. 우리가 사용하는 템플릿 이름은Line Drawing LibraryFMZ 플랫폼 전략 광장에서 직접 검색하면 얻을 수 있습니다.
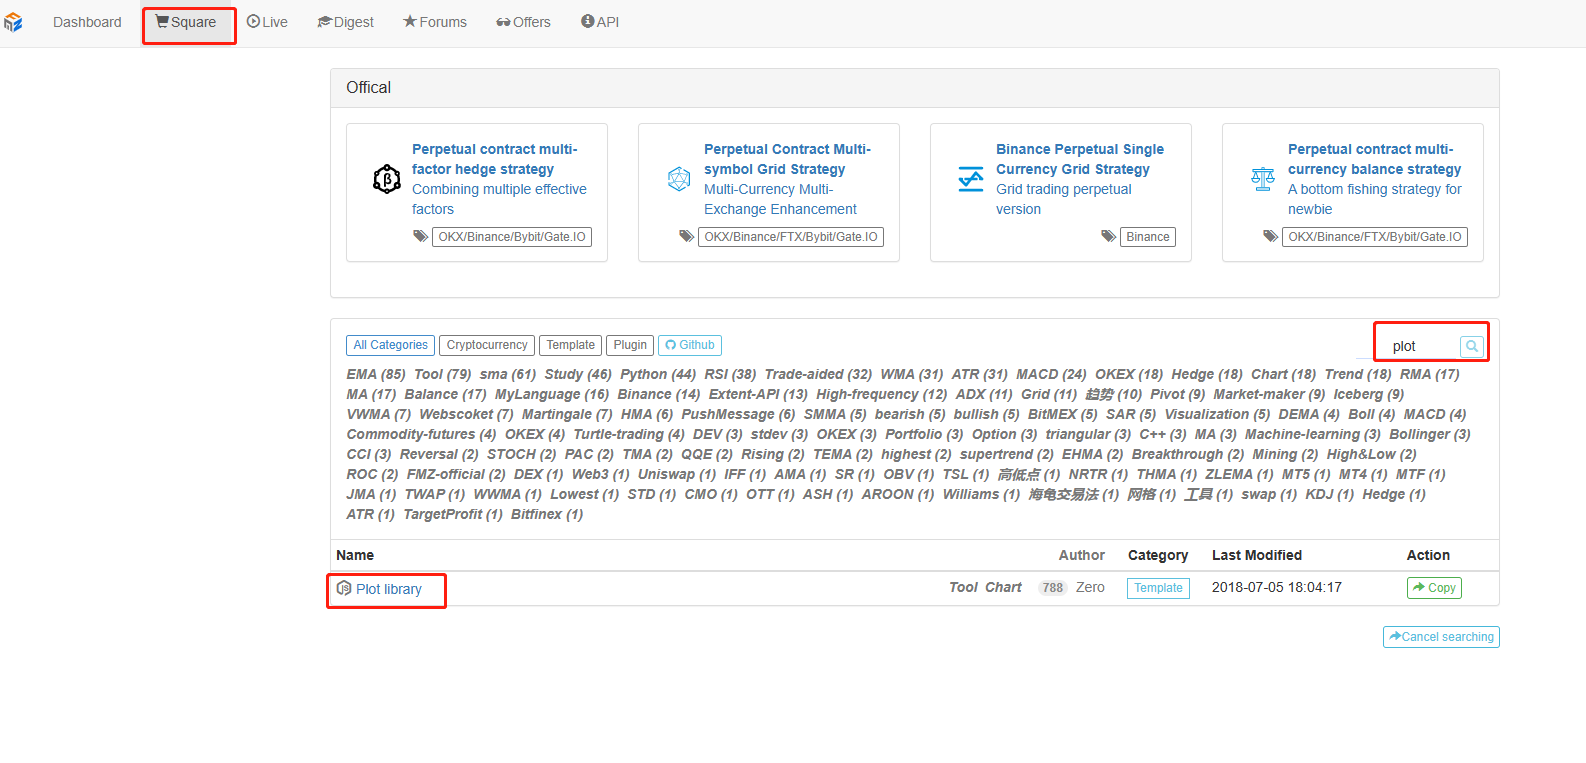
또는 링크를 직접 클릭하세요:https://www.fmz.com/strategy/27293이 템플릿의 복사 페이지로 이동합니다.
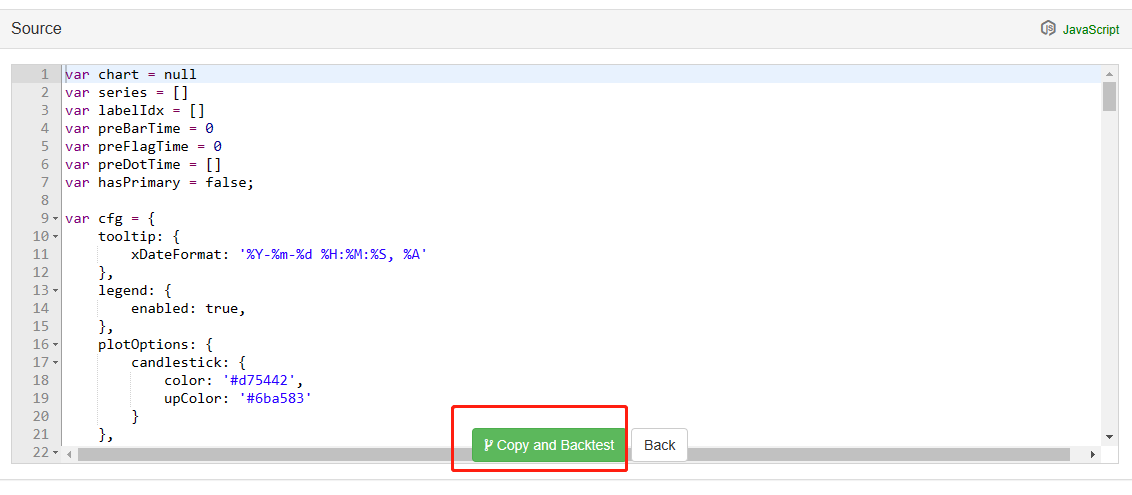
이 템플릿 클래스 라이브러리를 자신의 전략 라이브러리로 복사하기 위해 버튼을 클릭합니다.
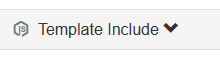
다음에는 전략 편집 페이지의 템플릿 컬럼에서 사용할 템플릿 클래스 라이브러리를 확인할 수 있습니다. 템플릿을 확인한 후 전략을 저장하면 전략이 이 템플릿을 참조합니다. 이것은 템플릿 클래스 라이브러리의 사용에 대한 간략한 설명입니다. 이 전략은 이미 이 템플릿을 참조했기 때문에 작업을 반복할 필요가 없습니다. 이 전략을 전략 광장에 복사하면Line Drawing Library전략 편집 페이지의 템플릿 바에 참조되었습니다.
우리는 주로Line Drawing Library그래프를 그리기 위해서요.
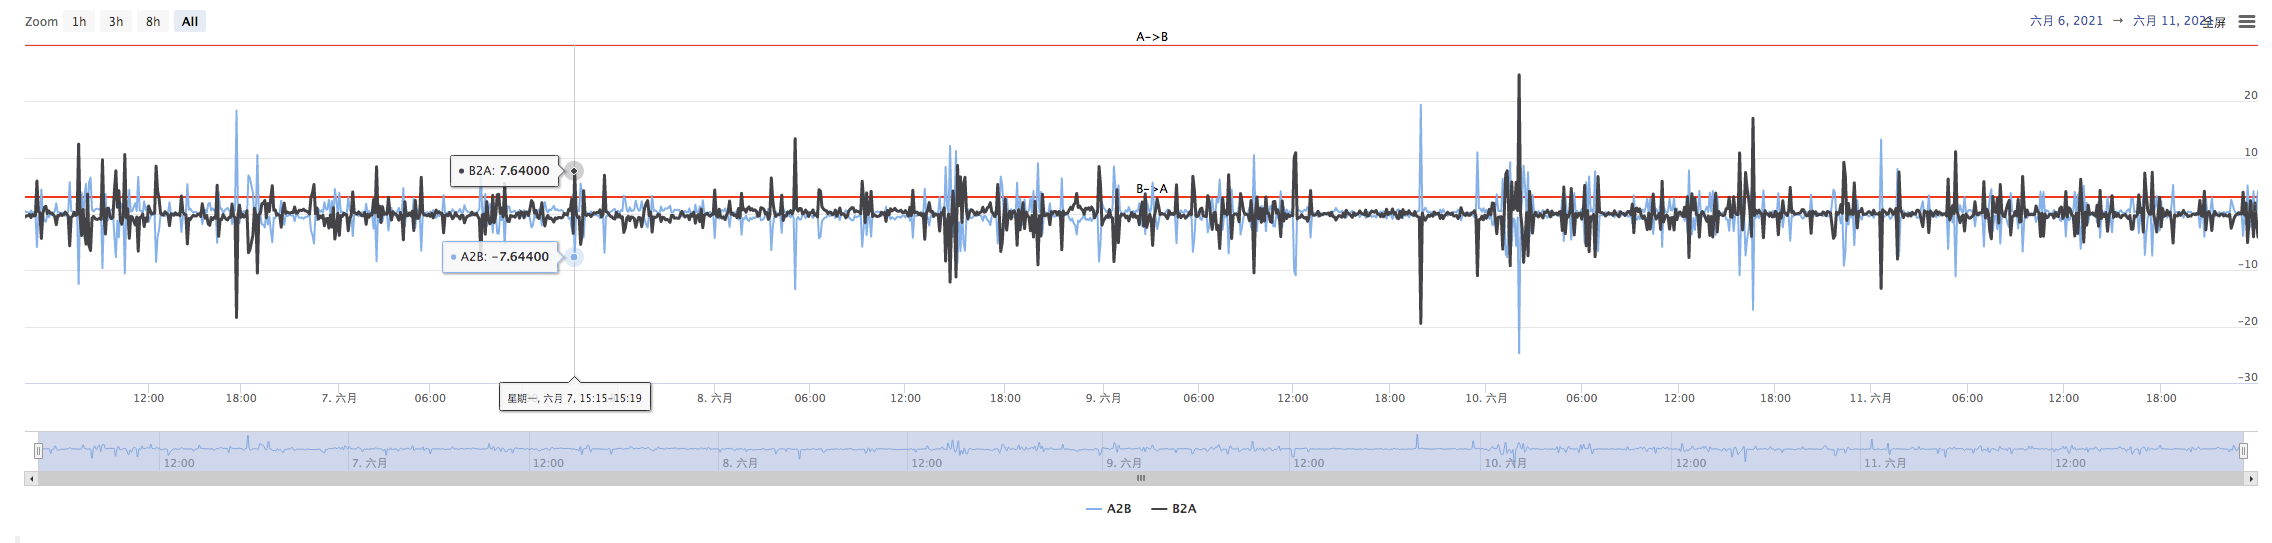
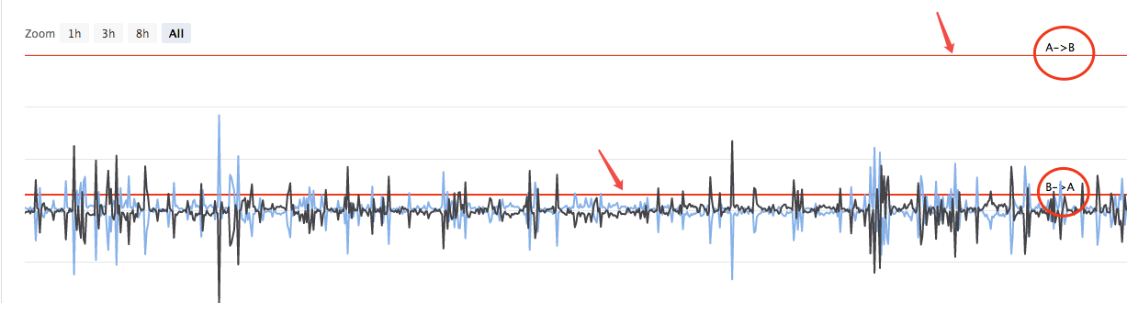
우리는A->B, 확산B->A, 그리고 스프레드의 트리거 라인입니다. 우리는 위의 그림과 같이 두 개의 곡선 (현행 A에서 B, B에서 A 스프레드), 두 개의 수평선 (트리거 스프레드 라인) 을 그리어야 합니다.
왜냐하면 우리는 일방적인 헤지링을 설계하고 싶어하기 때문입니다.A->B그리고B->A우리는 이전 기사에서 본 디자인을 사용할 수 없습니다.
이전 기사 에서:
      var targetDiffPrice = hedgeDiffPrice
      if (diffAsPercentage) {
          targetDiffPrice = (depthA.Bids[0].Price + depthB.Asks[0].Price + depthB.Bids[0].Price + depthA.Asks[0].Price) / 4 * hedgeDiffPercentage
      }
하나의 트리거 스프레드만 있습니다.targetDiffPrice- 네
여기서 우리는 코드를 변환해야 합니다. 먼저 매개 변수를 변환해야 합니다.

그러면 코드를 수정합니다:
        var targetDiffPriceA2B = hedgeDiffPriceA2B
        var targetDiffPriceB2A = hedgeDiffPriceB2A
        if (diffAsPercentage) {
            targetDiffPriceA2B = (depthA.Bids[0].Price + depthB.Asks[0].Price + depthB.Bids[0].Price + depthA.Asks[0].Price) / 4 * hedgeDiffPercentageA2B
            targetDiffPriceB2A = (depthA.Bids[0].Price + depthB.Asks[0].Price + depthB.Bids[0].Price + depthA.Asks[0].Price) / 4 * hedgeDiffPercentageB2A
        }
이 방법으로, 차이 트리거 라인은 이전targetDiffPrice2번으로targetDiffPriceA2B, targetDiffPriceB2A- 그래요
다음 단계는 도표에 이 데이터를 그리는 것입니다. 라인 드로잉 라이브러리의 드로잉 라인 함수를 사용하여요.
        // drawing
        $.PlotHLine(targetDiffPriceA2B, "A->B")  // The first parameter of this function is the value of the horizontal line in the Y-axis direction, and the second parameter is the display text
        $.PlotHLine(targetDiffPriceB2A, "B->A")
전략이 실행될 때, 이런 차트가 있습니다.
다음으로 실시간 스프레드 곡선을 그리는 것을 피하기 위해 선을 지나치게 그리십시오. 실시간 스프레드 데이터의 곡선을 그리는 코드를 균형을 확인합니다.
        if (ts - lastKeepBalanceTS > keepBalanceCyc * 1000) {
            nowAccs = _C(updateAccs, exchanges)
            var isBalance = keepBalance(initAccs, nowAccs, [depthA, depthB])
            cancelAll()
            if (isBalance) {
                lastKeepBalanceTS = ts
                if (isTrade) {
                    var nowBalance = _.reduce(nowAccs, function(sumBalance, acc) {return sumBalance + acc.Balance}, 0)
                    var initBalance = _.reduce(initAccs, function(sumBalance, acc) {return sumBalance + acc.Balance}, 0)
                    LogProfit(nowBalance - initBalance, nowBalance, initBalance, nowAccs)
                    isTrade = false
                }
            }

            $.PlotLine("A2B", depthA.Bids[0].Price - depthB.Asks[0].Price)  // Draw real-time spread curves
            $.PlotLine("B2A", depthB.Bids[0].Price - depthA.Asks[0].Price)  // The first parameter is the name of the curve, and the second parameter is the value of the curve at the current moment, that is, the value in the Y-axis direction at the current moment
        }
이 방법으로, 드로잉 코드는 4줄에 불과하며, 전략이 실행시 그래프를 표시할 수 있습니다.
일방적인 헤지 기능
앞서 언급했듯이 스프레드 트리거 라인은 두 개로 수정되었으며,A->B그리고B->A따라서 이전 주문 가격 알고리즘을 사용할 수 없으며 시장 가격에 슬립 가격을 추가하는 방법을 사용합니다.
        if (depthA.Bids[0].Price - depthB.Asks[0].Price > targetDiffPriceA2B && Math.min(depthA.Bids[0].Amount, depthB.Asks[0].Amount) >= minHedgeAmount) {          // A -> B market conditions are met
            var priceSell = depthA.Bids[0].Price - slidePrice
            var priceBuy = depthB.Asks[0].Price + slidePrice
            var amount = Math.min(depthA.Bids[0].Amount, depthB.Asks[0].Amount)
            if (nowAccs[0].Stocks > minHedgeAmount && nowAccs[1].Balance * 0.8 / priceSell > minHedgeAmount) {
                amount = Math.min(amount, nowAccs[0].Stocks, nowAccs[1].Balance * 0.8 / priceSell, maxHedgeAmount)
                Log("trigger A->B:", depthA.Bids[0].Price - depthB.Asks[0].Price, priceBuy, priceSell, amount, nowAccs[1].Balance * 0.8 / priceSell, nowAccs[0].Stocks)  // Tips
                hedge(exB, exA, priceBuy, priceSell, amount)
                cancelAll()
                lastKeepBalanceTS = 0
                isTrade = true
            }
        } else if (depthB.Bids[0].Price - depthA.Asks[0].Price > targetDiffPriceB2A && Math.min(depthB.Bids[0].Amount, depthA.Asks[0].Amount) >= minHedgeAmount) {   // B -> A market conditions are met
            var priceBuy = depthA.Asks[0].Price + slidePrice
            var priceSell = depthB.Bids[0].Price - slidePrice
            var amount = Math.min(depthB.Bids[0].Amount, depthA.Asks[0].Amount)
            if (nowAccs[1].Stocks > minHedgeAmount && nowAccs[0].Balance * 0.8 / priceBuy > minHedgeAmount) {
                amount = Math.min(amount, nowAccs[1].Stocks, nowAccs[0].Balance * 0.8 / priceBuy, maxHedgeAmount)
                Log("trigger B->A:", depthB.Bids[0].Price - depthA.Asks[0].Price, priceBuy, priceSell, amount, nowAccs[0].Balance * 0.8 / priceBuy, nowAccs[1].Stocks)  //Tips
                hedge(exA, exB, priceBuy, priceSell, amount)
                cancelAll()
                lastKeepBalanceTS = 0
                isTrade = true
            }
        }
구매 및 판매 가격이 두 개의 데이터로 분리되기 때문에 헤지 함수는hedge또한 수정되어야 합니다.
function hedge(buyEx, sellEx, priceBuy, priceSell, amount) {
    var buyRoutine = buyEx.Go("Buy", priceBuy, amount)
    var sellRoutine = sellEx.Go("Sell", priceSell, amount)
    Sleep(500)
    buyRoutine.wait()
    sellRoutine.wait()
}
또한 이 변경 사항에 근거한 몇 가지 작은 조정도 있습니다. 여기서 반복하지 않겠습니다. 자세한 내용은 코드에서 볼 수 있습니다.
헤지 스프레드 라인 같은 매개 변수를 상호적으로 수정합니다.
전략에 상호 작용을 추가하여 전략이 실시간으로 스프레드 트리거 라인을 수정 할 수 있습니다. 이것은 반 자동 전략의 설계 요구 사항입니다. 전략 상호 작용 설계도 매우 간단합니다. 먼저 전략 편집 페이지에서 전략에 상호 작용 컨트롤을 추가합니다.

두 개의 컨트롤을 추가, 하나는 A2B와 하나 B2A라고 합니다. 컨트롤 입력 상자에 값을 입력 한 후, 입력 상자 오른쪽의 버튼을 클릭합니다. 명령어는 즉시 전략에 전송됩니다, 예를 들어: 값을 입력123입력 상자에서A2B버튼을 누르면 즉시 전략에 명령이 보내집니다.
A2B:123
전략 코드에서 대화형 탐지 및 처리 코드를 설계합니다.
        // interact
        var cmd = GetCommand()   // Every time the loop is executed here, it checks whether there is an interactive command, and returns to an empty string if not.
        if (cmd) {               // An interactive command was detected, such as A2B:123
            Log("command received:", cmd)
            var arr = cmd.split(":")   // Split out the interactive control name and the value in the input box, arr[0] is A2B, arr[1] is 123
            if (arr[0] == "A2B") {     // Determine whether the triggered interactive control is A2B
                Log("Modify the parameters of A2B, ", diffAsPercentage ? "The parameter is the difference percentage" : "The parameter is the difference:", arr[1])
                if (diffAsPercentage) {
                    hedgeDiffPercentageB2A = parseFloat(arr[1])     // Modify the trigger spread line
                } else {
                    hedgeDiffPriceA2B = parseFloat(arr[1])          // Modify the trigger spread line
                }
            } else if (arr[0] == "B2A") {           // Triggered control detected is B2A
                Log("Modify the parameters of B2A, ", diffAsPercentage ? "The parameter is the difference percentage" : "The parameter is the difference:", arr[1])
                if (diffAsPercentage) {
                    hedgeDiffPercentageA2B = parseFloat(arr[1])
                } else {
                    hedgeDiffPriceB2A = parseFloat(arr[1])
                }
            }
        }
상태 표시줄 정보를 정리하고 테이블 형식으로 표시
상태 표시줄 데이터를 더 조직적이고 쉽게 관찰 할 수 있도록하십시오.
        var tbl = {
            "type" : "table",
            "title" : "data",
            "cols" : ["exchange", "coin", "freeze coin", "denominated currency", "freeze denominated currency", "trigger spread", "current spread"],
            "rows" : [],
        }
        tbl.rows.push(["A:" + exA.GetName(), nowAccs[0].Stocks, nowAccs[0].FrozenStocks, nowAccs[0].Balance, nowAccs[0].FrozenBalance, "A->B:" + targetDiffPriceA2B, "A->B:" + (depthA.Bids[0].Price - depthB.Asks[0].Price)])
        tbl.rows.push(["B:" + exB.GetName(), nowAccs[1].Stocks, nowAccs[1].FrozenStocks, nowAccs[1].Balance, nowAccs[1].FrozenBalance, "B->A:" + targetDiffPriceB2A, "B->A:" + (depthB.Bids[0].Price - depthA.Asks[0].Price)])

        LogStatus(_D(), "\n", "`" + JSON.stringify(tbl) + "`")

백테스팅
백테스팅은 테스트 전략, 예비 탐지 기능에 불과하며 많은 버그가 백테스팅 단계에서 실제로 테스트 될 수 있습니다. 백테스팅 결과에 너무 많은 관심을 기울이는 것은 필요하지 않습니다. 최종 전략은 여전히 실제 환경에서 테스트되어야합니다.

전략 소스 코드:https://www.fmz.com/strategy/302834
- 암호화폐 시장의 근본 분석을 정량화: 데이터를 스스로 이야기하도록!
- 동전圈의 기초적인 양적 연구 - 더 이상 모든
선생님들을 믿지 말고, 데이터를 객관적으로 이야기하십시오! - 양적 거래의 필수 도구 - 발명자 양적 데이터 탐색 모듈
- 모든 것을 마스터 - FMZ에 대한 소개 트레이딩 터미널의 새로운 버전 (TRB 중재 소스 코드)
- FMZ의 새로운 거래 단말기 소개 (TRB 리비트 소스 추가)
- FMZ 퀀트: 암호화폐 시장에서 공통 요구 사항 설계 예제 분석 (II)
- 80 줄의 코드에서 고주파 전략으로 뇌 없는 판매봇을 이용하는 방법
- FMZ 정량화: 암호화폐 시장의 일반적인 요구 디자인 사례 분석 (II)
- 80줄의 코드의 고주파 전략으로 뇌 없는 로봇을 파는 방법
- FMZ Quant: 암호화폐 시장에서 공통 요구 사항 디자인 예의 분석 (I)
- FMZ 정량화: 암호화폐 시장의 일반적인 요구 디자인 사례 분석 (1)