Trailing-Stop-Loss-Strategie basierend auf Point-Stop-Loss und Take-Profit
Überblick
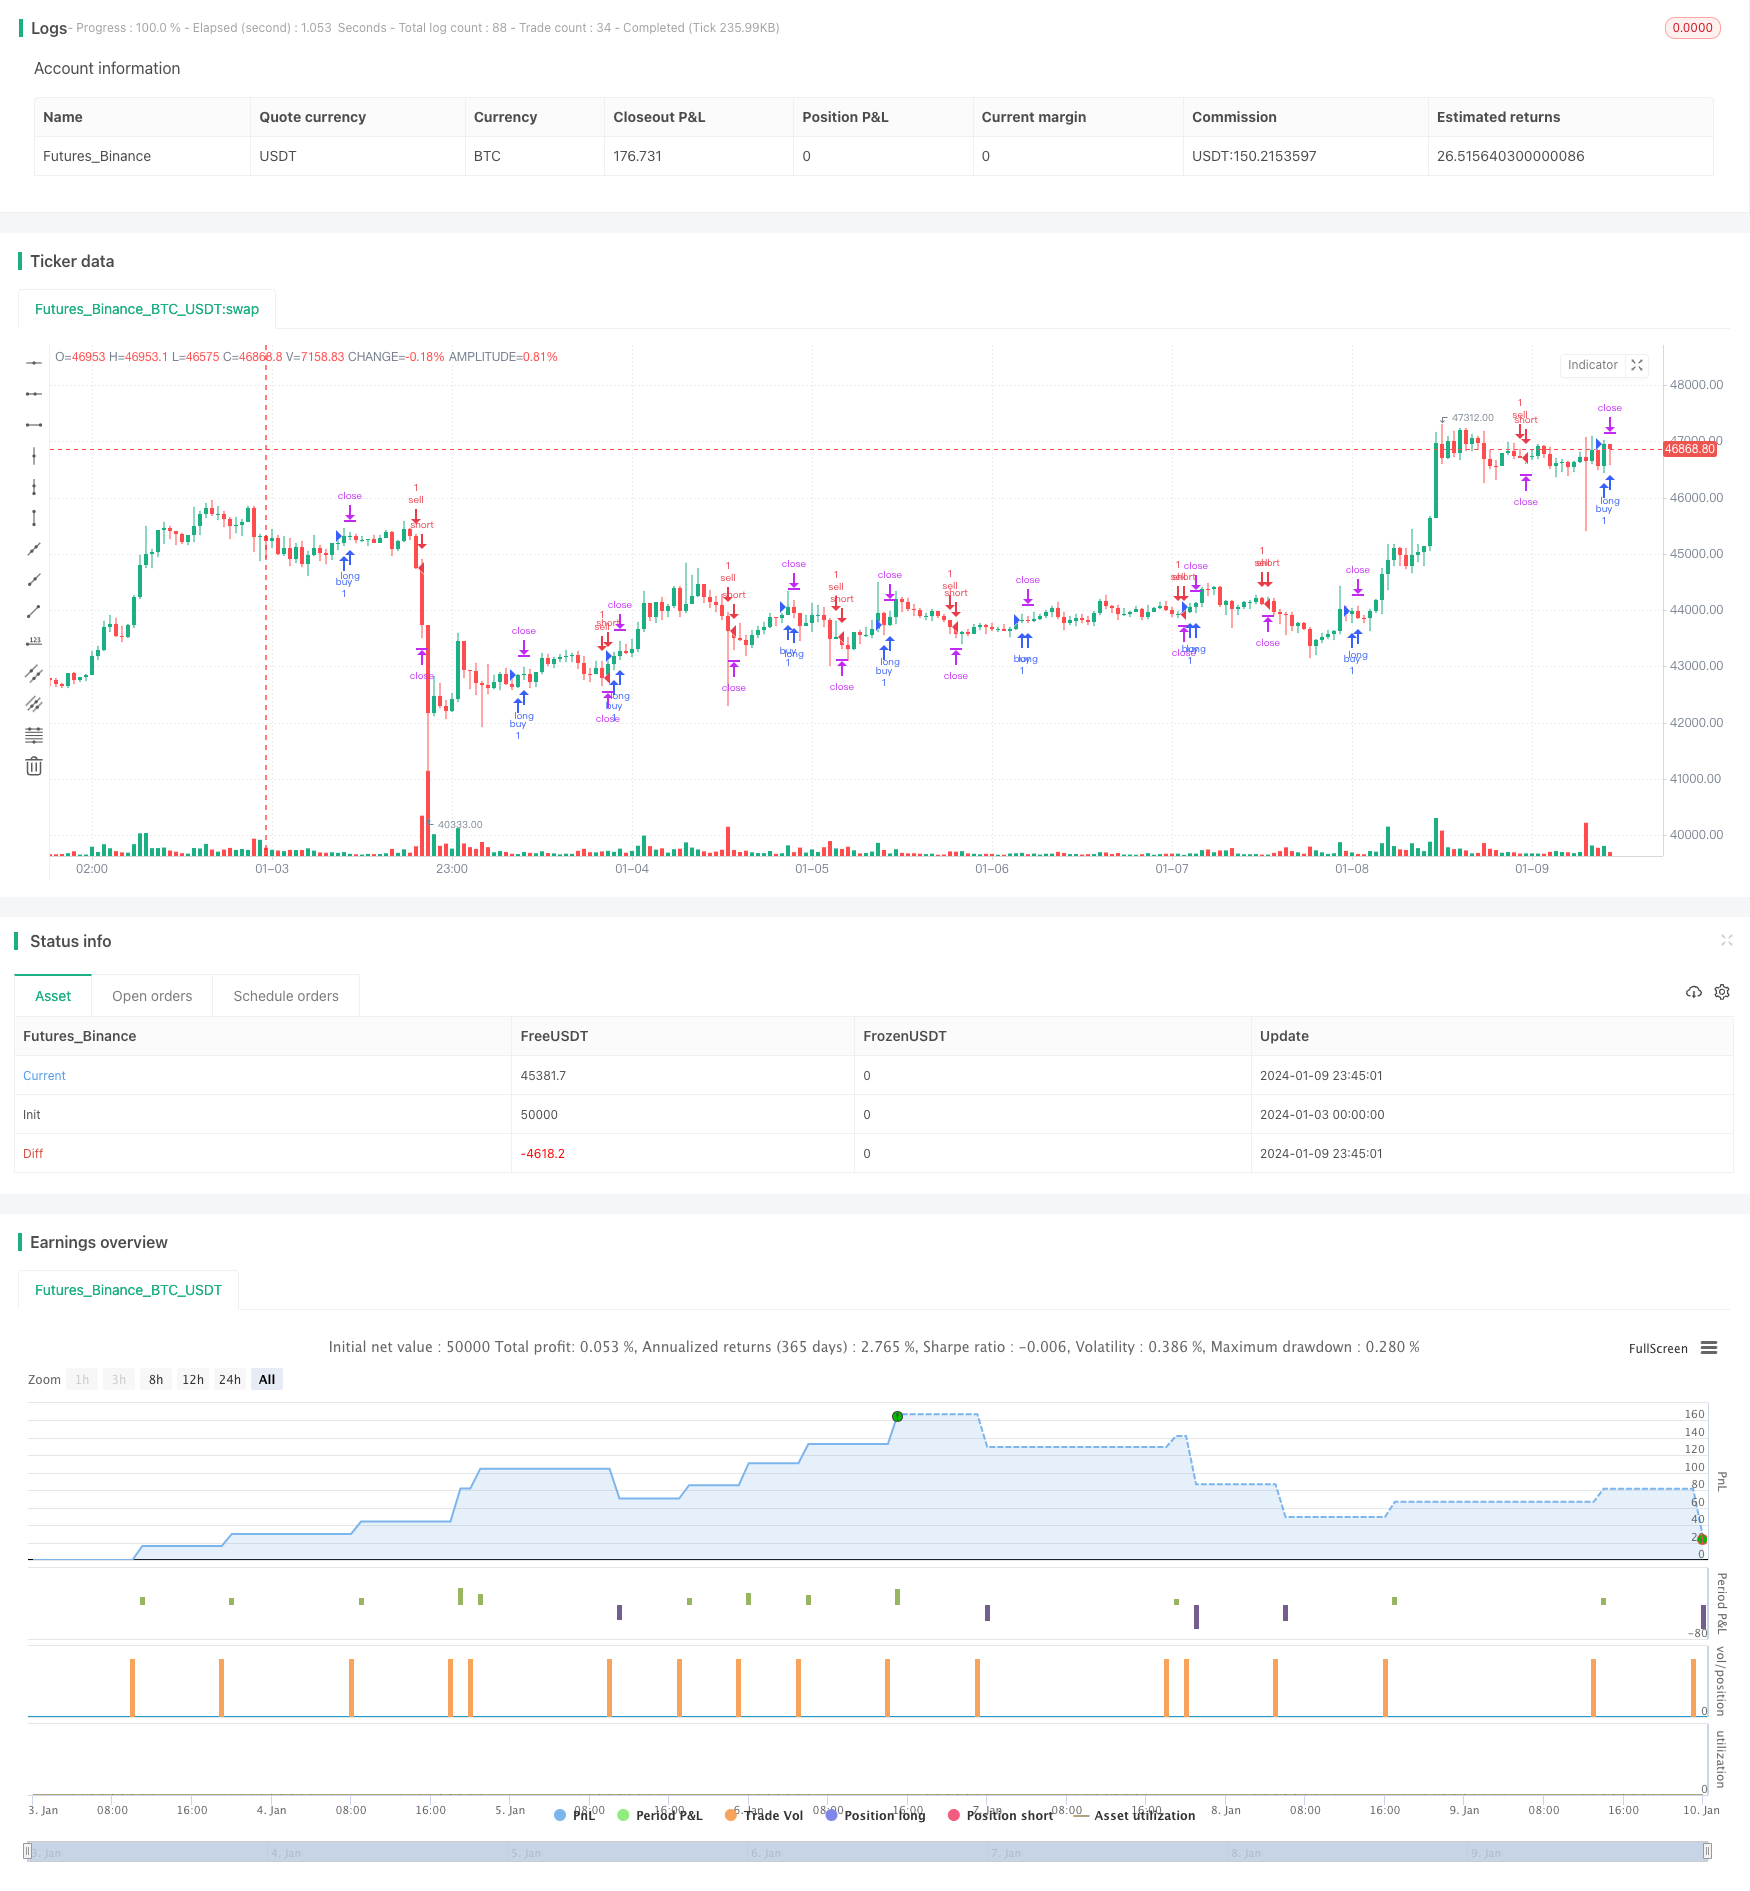
Die Kernidee der Strategie besteht darin, die Kreuzung von EMA und WMA als Einstiegssignal zu nutzen und in Kombination mit einem Stop-Loss-Stop, der auf einer Punktzahl basiert, zu handeln. Der größte Vorteil besteht darin, dass das Risiko sehr flexibel und präzise gesteuert werden kann, indem die Stop-Loss-Stop-Werte durch Anpassung der Punktzahl gesteuert werden.
Strategieprinzip
Wenn die EMA von unten nach oben brechen WMA erzeugt mehrere Signale; wenn die EMA von oben nach unten brechen WMA, erzeugt ein Stop-Loss-Signal. Nach dem Eintritt in die Position, wird in Echtzeit die Einstiegspunkt berechnet, und auf dieser Grundlage setzen Sie Stop-Loss und Stop-Stop. Zum Beispiel setzen Sie den Stop-Loss 20 Punkte, Stop-Stop 100 Punkte, dann ist der spezifische Stop-Loss-Preis der Einstiegspreis minus 20 Punkte*Der Auftragswert, der Stop-Loss-Preis ist der Einstiegspreis plus 100 Punkte.*Der Wert des Vertrages. Damit werden Risiken und Gewinne kontrolliert.
Die Strategie kombiniert auch die Vergleiche der aktuellen Börsenöffnung mit den historischen Stop-Losses und passt die Stop-Loss-Position an, um den Stop-Loss-Follow-Preis zu erreichen.
Analyse der Stärken
Der größte Vorteil dieser Strategie gegenüber einer gewöhnlichen festen Punktzahl oder einem prozentualen Stop-Loss besteht darin, dass das Risiko sehr flexibel und präzise gesteuert werden kann. Die Größe der Anpassung der Punktzahl beeinflusst direkt die Größe der Stop-Loss-Werte. Dies ist für verschiedene Sorten sehr praktisch und kann je nach Häufigkeit und Größe der Schwankungen des Marktes leicht angepasst werden.
Außerdem ist der Stromstop eine sehr praktische Funktion. Er kann die Stop-Loss-Position in Echtzeit anhand von Änderungen der Marktlage anpassen, um die größtmöglichen Gewinne zu erzielen, während die Risikokontrolle gewährleistet ist.
Risikoanalyse
Die Risiken für diese Strategie bestehen vor allem aus den beiden Indikatoren EMA und WMA selbst. Sie geben oft falsche Signale ab, wenn sich die Marktlage stark verändert, und sind leicht zu stoppen. In diesem Fall wird empfohlen, die Stop-Loss-Punkte entsprechend zu lockern oder eine andere Kombination von Indikatoren zu ersetzen.
Ein weiterer Risikopunkt ist, dass die Stop-Loss-Stopps schwer gleichzeitig zu bewältigen sind. Wenn man nach höheren Stopps strebt, muss man in der Regel ein höheres Risiko eingehen, was leicht dazu führt, dass man bei einem Kurswechsel stoppt. Daher müssen die Einstellungen der Stop-Loss-Stopps sorgfältig getestet und bewertet werden.
Optimierungsrichtung
Die Strategie kann in folgenden Richtungen optimiert werden:
- Testen von EMA- und WMA-Kombinationen mit verschiedenen Parametern, um die besten Parameter zu finden;
- Versuchen Sie, andere Indikatoren wie MACD, KDJ zu kombinieren oder zu ersetzen, um zu sehen, ob Sie Ihre Gewinnquote verbessern können.
- Risiko-Rendite-Bewertung von verschiedenen Stop-Loss-Stopp-Punkten zu bewerten, um die optimale Konfiguration zu finden;
- Das Projekt wurde von einer Gruppe von Wissenschaftlern und Wissenschaftlerinnen entwickelt, die sich mit der Frage befassen, wie man die verschiedenen Arten untersuchen kann.
- Die dynamische Optimierung der Parameter durch die Einbindung von Machine Learning Algorithmen.
Zusammenfassen
Die Strategie basiert auf den EMA- und WMA-Indikatoren und nutzt eine auf Punkten basierende Stop-Loss-Strategie zur Risikokontrolle. Die Strategie hat den Vorteil, dass die Risikokontrolle genau und flexibel ist und sich an die verschiedenen Märkte anpassen lässt. Anschließend kann die Strategie aus den Bereichen Einstiegssignale, Parameterwahl, Stop-Loss-Strategie usw. in der Tiefe optimiert werden, um sie besser an die komplexen und wechselnden Marktbedingungen anzupassen.
/*backtest
start: 2024-01-03 00:00:00
end: 2024-01-10 00:00:00
period: 45m
basePeriod: 5m
exchanges: [{"eid":"Futures_Binance","currency":"BTC_USDT"}]
*/

// inspiration script from: @ahmad_naquib
// inspiration script link: https://www.tradingview.com/script/tGTV8MkY-Two-Take-Profits-and-Two-Stop-Loss/
// inspiration strategy script name: Two Take Profits and Two Stop Loss


////////////
// Do not use this strategy, it's just an exmaple !! The goal from this script is to show you TP and SL based on PIPS
////////////


//@version=5
strategy('SL & TP based on Pips', "PIP SL & TP", overlay=true, initial_capital=1000)

// MA
ema_period = input(title='EMA period', defval=10)
wma_period = input(title='WMA period', defval=20)
ema = ta.ema(close, ema_period)
wma = ta.wma(close, wma_period)

// Entry Conditions
long = ta.crossover(ema, wma) and nz(strategy.position_size) == 0
short = ta.crossunder(ema, wma) and nz(strategy.position_size) == 0

// Pips Calculation
pip1 = input(20, title = "TP PIP", group = "PIP CALCULATION") * 10 * syminfo.mintick
pip2 = input(20, title = "SL PIP", group = "PIP CALCULATION") * 10 * syminfo.mintick

// Trading parameters
var bool LS = na
var bool SS = na

var float EP = na // Entry Position
var float TVL = na
var float TVS = na
var float TSL = na
var float TSS = na

var float TP1 = na
//var float TP2 = na
var float SL1 = na
///var float SL2 = na

// SL & TP Values
// there's also SL2 and TP2 in case you want to add them to your script,
//also you can add a break event in the strategy.entry section.

if short or long and strategy.position_size == 0
    EP := close
    SL1 := EP - pip2 * (short ? -1 : 1)
    //SL2 := EP - pip2 * (short ? -1 : 1)

    TP1 := EP + pip1 * (short ? -1 : 1)
    //TP2 := EP + pip1 * 2 * (short ? -1 : 1)


// current trade direction
LS := long or strategy.position_size > 0
SS := short or strategy.position_size < 0

// adjust trade parameters and trailing stop calculations
TVL := math.max(TP1, open) - pip1[1]
TVS := math.min(TP1, open) + pip1[1]
TSL := open[1] > TSL[1] ? math.max(TVL, TSL[1]) : TVL
TSS := open[1] < TSS[1] ? math.min(TVS, TSS[1]) : TVS

//if LS and high > TP1
    //if open <= TP1
        //SL2 := math.min(EP, TSL)

//if SS and low < TP1
    //if open >= TP1
        //SL2 := math.max(EP, TSS)


// Closing conditions
// and those are a closing conditions in case you want to add them.

//close_long = LS and open < SL2
//close_short = SS and open > SL2

// Buy
if (long and not SS)
    strategy.entry('buy', strategy.long)
strategy.exit('exit1', from_entry='buy', stop=SL1, limit=TP1, qty_percent=100)
//strategy.exit('exit2', from_entry='buy', stop=SL2, limit=TP2)

// Sell
if (short and not LS)
    strategy.entry('sell', strategy.short)
strategy.exit('exit3', from_entry='sell', stop=SL1, limit=TP1, qty_percent=100)
//strategy.exit('exit4', from_entry='sell', stop=SL2, limit=TP2)

// Plots
// those are plots for the lines of The tp and sl. they are really useful, and in the next update I will use a filling option.

a = plot(strategy.position_size > 0 ? SL1 : na, color=color.new(#af0829, 30), linewidth = 2, style=plot.style_linebr)
b = plot(strategy.position_size < 0 ? SL1 : na, color=color.new(#af0829, 30), linewidth = 2, style=plot.style_linebr)

c = plot(strategy.position_size > 0 ? TP1 : na, color=color.new(#2e7e00, 30), linewidth = 2, style=plot.style_linebr)
d = plot(strategy.position_size < 0 ? TP1 : na, color=color.new(#2e7e00, 30), linewidth = 2, style=plot.style_linebr)

g = plot(strategy.position_size >= 0 ? na : EP, color=color.new(#ffffff, 50), style=plot.style_linebr)
h = plot(strategy.position_size <= 0 ? na : EP, color=color.new(#ffffff, 50), style=plot.style_linebr)


// those are plot for the TP2 and SL2, they are optional if you want to add them.

//e = plot(strategy.position_size > 0 ? TP2 : na, color=color.new(#00ced1, 0), style=plot.style_linebr)
//f = plot(strategy.position_size < 0 ? TP2 : na, color=color.new(#00ced1, 0), style=plot.style_linebr)


//those are the plot for the ema and wma strategy for short and long signal. they are not really a good strategy, I just used them as an example
//but you have the option to plot them or not.
// do not use this strategy, it's just an exmaple !! The goal from this script is to show you TP and SL based on PIPS

//plot(ema, title='ema', color=color.new(#fff176, 0))
//plot(wma, title='wma', color=color.new(#00ced1, 0))